Introduction
Following document provides a detailed description of the functionalities in the MOD portal. The screenshots and explanation shall help and assist various users who are using MOD Protal.
Following are the users identified for this systems–
1.AO Uploader (Accounts Office Uploader)
2.AO (Accounts Officer)
3.CMP (SBI Cash Management Product Centre User)
4.CDA ()
5.CGDA ()
6.Viewer User
7.GOVTADMIN and SUPERAMIN
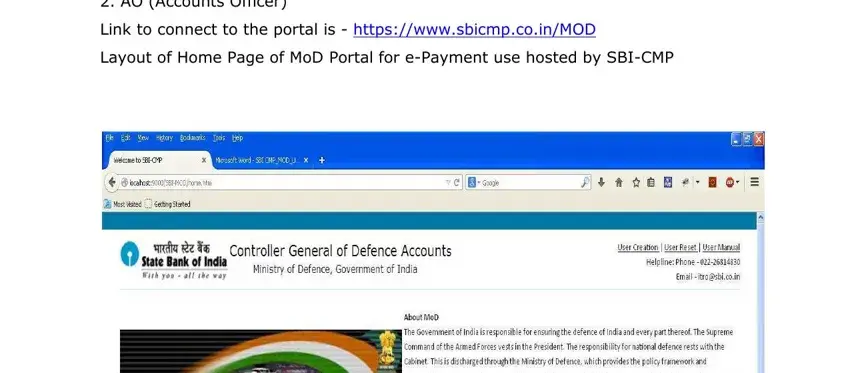
Link to connect to the portal is - https://www.sbicmp.co.in/MOD
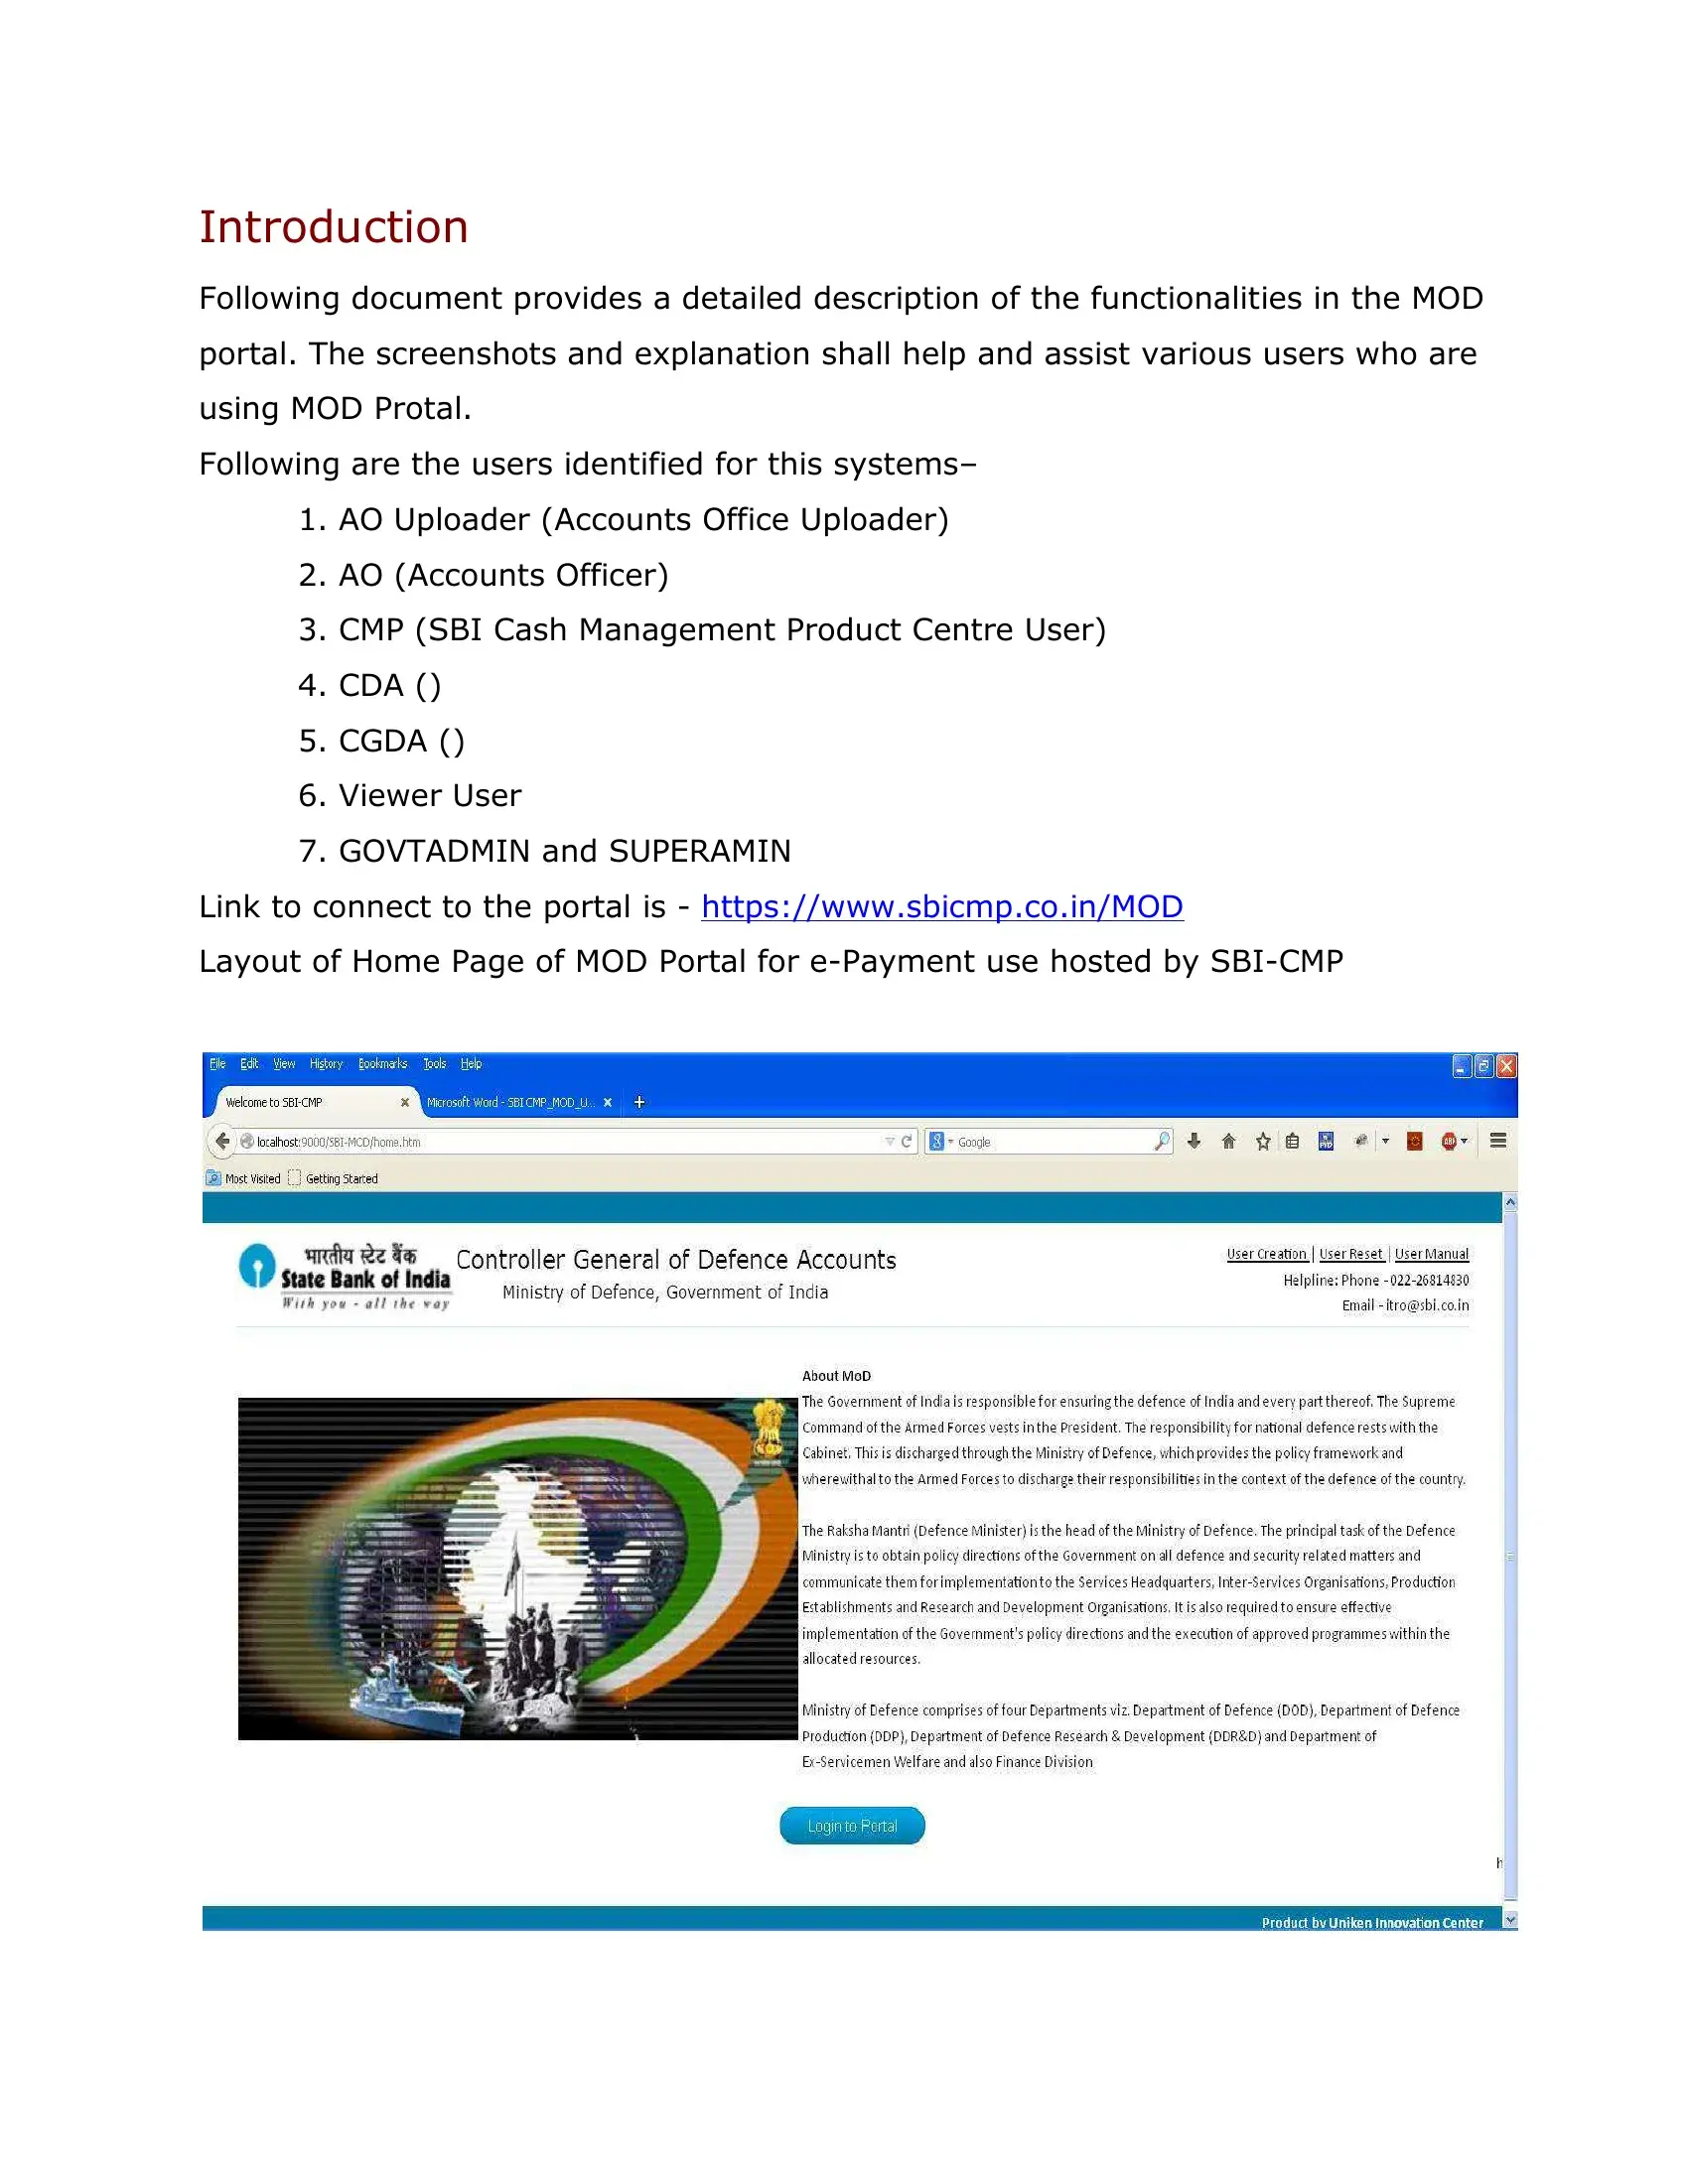
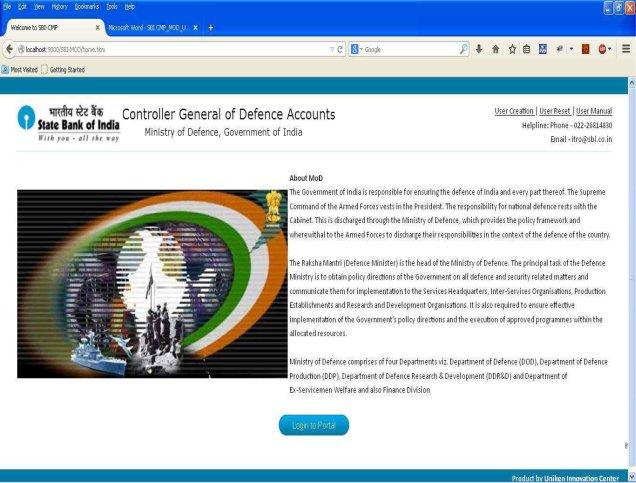
Layout of Home Page of MOD Portal for e-Payment use hosted by SBI-CMP
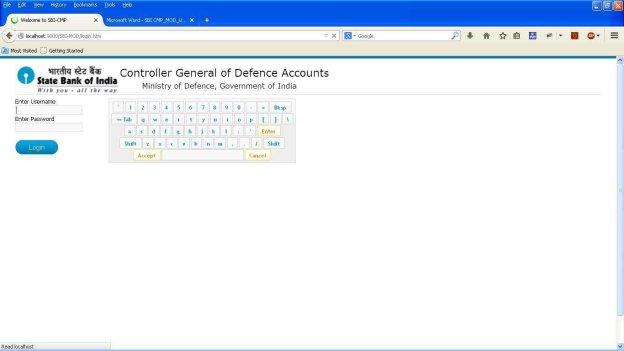
Layout of the Login Page where User-ID and password need to be input is as under
Normal Usage as per the Roles -
AO (Accounts Officer)
1.The Accounts Officer/s (AO) will login to the system with the Login Credentials provided to them
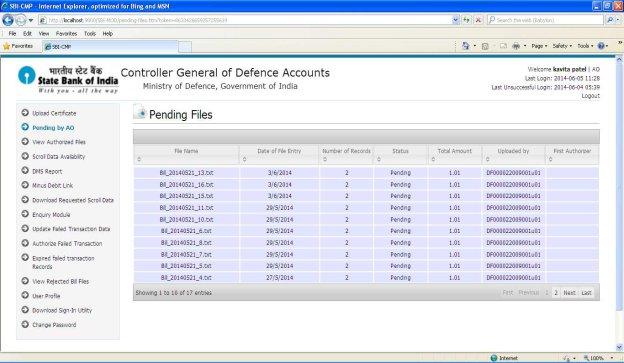
2.After successful login AO user shall see the Landing page – Pending by AO
3.AO User – Upload Certificate:
This link is explained in digital signature section.
For any help please refer Digital Signature -> AO user point -3
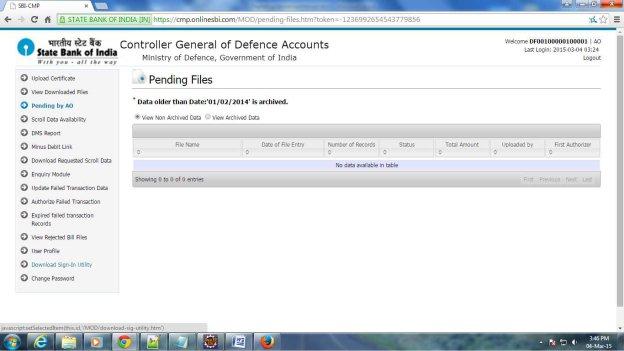
4.AO User – Pending By AO:
AO User clicks on the “Pending by AO” to view all the ‘pending’ & ‘pending second authorization’ files whose CDA code & Sub-Office code are same as in user to
authorize.
∙AO User can view all the pending files matches cda and sub office code of user to authorize.
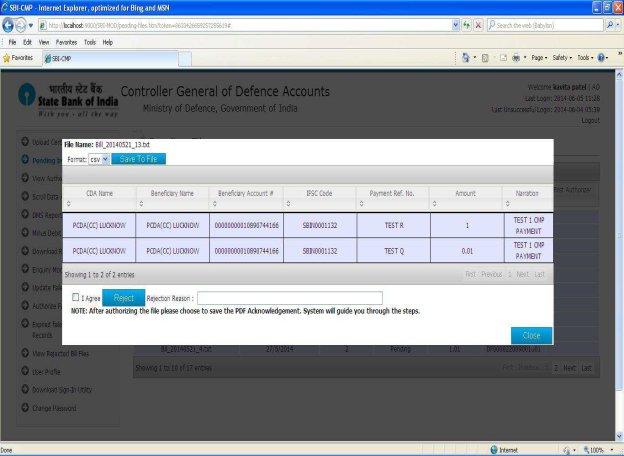
∙AO user can click on file name to view file records.
∙Check the ‘I agree’ checkbox user can see two options ‘Authorize’ & ‘Reject’.
If the status of file is ‘pending’ and user clicks on ‘Authorize’ button first authorization is done then status of the file is ‘Pending second Authorization’ and user can view the file in ‘Pending by AO’ link to other AO user whose CDA code & Sub-Office code are same.
If the status of file is ‘pending second authorization’ and user clicks on ‘Authorize’ button second authorization is done then status of the file is authorized & user can see the file in ‘View Authorized File’.
AO user can reject the file by clicking ‘Reject’ button with rejection reason. User can view rejected files in ‘View Rejected Bill Files’ link.
5.AO User – View Authorized Files:
AO User clicks on the “View Authorized Files” to view all the authorized files whose
CDA code & Sub-Office code are same as in user.
∙AO user can select the date ‘Upload Date’ and then clicks on ‘Search Data’ button to see the authorized files uploaded on selected date.
∙By default, AO user can see all the authorized files.
6.AO User – Scroll data Availability:
AO User clicks on the “Scroll Data Availability” to view the scroll data of status 01 & 09 whose CDA code & Sub-Office code are same as in the AO user.
∙AO user can select the ‘Settlement Date’ range from ‘Start Date’ and ‘End Date’ or enter the file name (to search the scroll data based on the FILENAME) and then clicks on ‘Search Data’ button to see the scroll data of settlement date.
∙For eg. If the user selects the date range as 20/09/2013 to 30/09/2013 and clicks on search scroll availability each day shows separately for the total amount and total no of records and a provision to download the scroll.
∙AO user can send the request to download scroll data of status 01 & 09 date wise.
∙AO user can download data in three different file types i.e. txt, csv, pdf.
∙AO user can send one or multiple request to download scroll data.
7.AO User – DMS Report:
AO User clicks on the “DMS Report” to view the Reconciliation report of matching
CDA & Sub-office code with AO user.
∙AO user can select the date range from ‘Start Date’ and ‘End Date’ between 90 days and then clicks on ‘Search Data’ button to see the total amount of success transaction(01 status) and failed transaction(09 status) of scroll and settlement and difference between them.
∙AO user can export dms data in pdf file format.
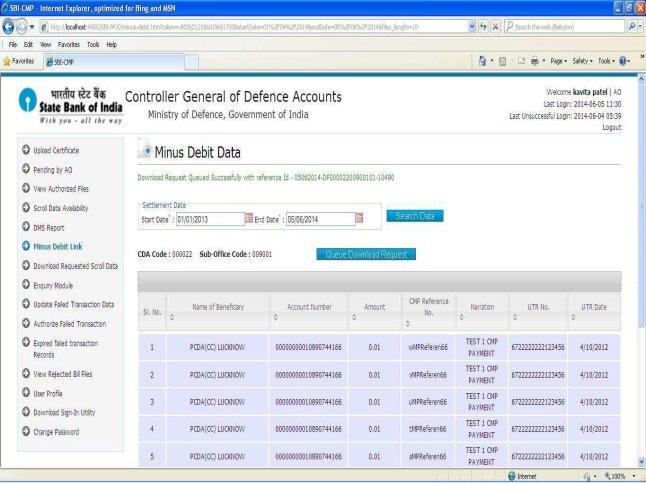
8.AO User – Minus Debit Link:
AO User clicks on the “Minus Debit Link” to view the scroll data of status 09 whose CDA & Sub-office codes are same as in AO user.
∙AO user can select the ‘Settlement Date’ range from ‘Start Date’ and ‘End Date’ and then clicks on ‘Search Data’ button to see the scroll data of status 09 for given settlement date.
∙AO user can send the request to download scroll data of status 09 date.
∙AO user can download data in pdf file.
∙AO user can send one or multiple request to download scroll data.
9.AO User – Download Requested Scroll Data:
AO User clicks on the “Download Requested Scroll data” Link to view & download requested scroll data of status 01 & 09 whose CDA & Sub-office codes are same as in AO user.
∙AO user can view all the requests raised by logged user.
∙AO user can select the date range from ‘Start Date’ and ‘End Date’ and then clicks on ‘Search Data’ button to see the status of requested scroll data.
∙AO user can search requested data by reference no.
∙AO user clicks on the “Download” button to download scroll data.
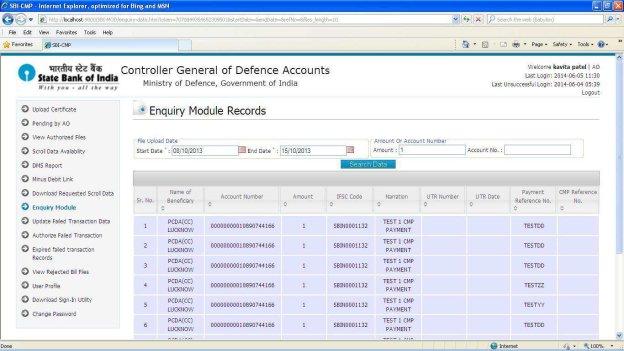
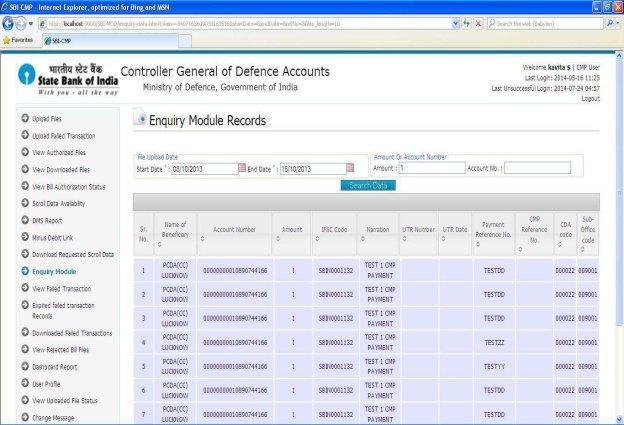
10.AO User – Enquiry Module:
AO User clicks on the “Enquiry Module” Link to view scroll data of status 01 & 09 whose CDA & Sub-office codes are same as in AO user.
∙AO user can select the date range from ‘Start Date’ and ‘End Date’ between 7 days and then clicks on ‘Search Data’ button to view scroll data of status 01 & 09.
∙AO user enters amount or account number to search the scroll data based on the amount/account no.
11.AO User – Update Failed Transaction Data:
AO User clicks on the “Update Failed Transaction Data” Link to view failed transaction records whose CDA & Sub-office codes are same as in logged user.
∙AO user can select the ‘Upload Date’ range from ‘Start Date’ and ‘End Date’ and then clicks on ‘Search Data’ button to view failed transactions.
∙AO user enters amount to search the failed transactions based on the amount.
∙AO user can select one or multiple records and clicks ‘Download Selected Records’ button to download them.
∙AO user can download all failed transaction records by clicking ‘Download All Files’.
∙AO user can Update/Reject failed transaction records.
∙Double authorization is required to authorize failed transaction records.
∙If one AO user Update/reject records then records are available to other user of same CDA and Sub-Office Code to Authorize/Reject.
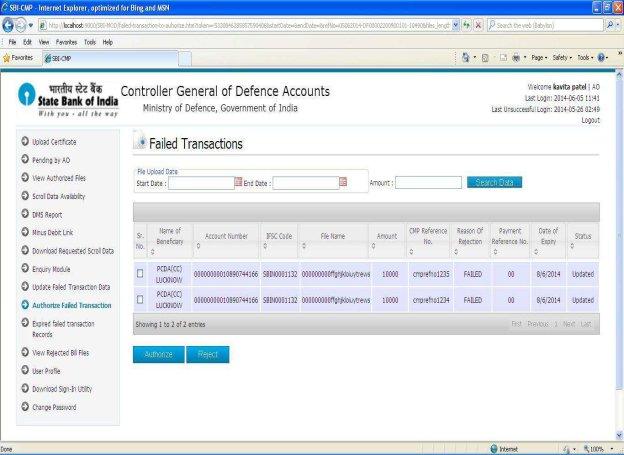
12.AO User – Authorize Failed Transaction:
AO User clicks on the “Authorize Failed Transaction” Link to Authorize/Reject failed transaction records whose CDA & Sub-office codes are same as in logged user.
∙AO user can select the ‘Upload Date’ range from ‘Start Date’ and ‘End Date’ and then clicks on ‘Search Data’ button to view failed transactions.
∙AO user enters amount to search the failed transactions based on the amount.
∙AO user can select one or multiple records to Authorize/Reject.
∙If the status of the record is updated and user is authorizing that record then status of the record becomes ‘Authorize’.
∙If the status of the record is updated and user is rejecting that record then status of the record becomes ‘Pending’ and record is available to update in
‘Update Failed Transaction Data’ link.
∙If the status of the record is rejected and user is authorizing that record then record will expire.
∙If the status of the record is rejected and user is rejecting that record then status of the record becomes ‘Pending’ and record is available to update in ‘Update Failed Transaction Data’ link.
13.AO User – Expired Failed Transaction Records:
AO User clicks on the ‘Expired Failed Transaction Records’ Link to view expired
failed transaction data whose CDA & Sub-office codes are same as in logged user.
∙AO user can select the date range from ‘Start Date’ and ‘End Date’ and then clicks on ‘Search Data’ button to view expired failed transaction data.
∙If failed transaction records are not authorized/updated then those records will expire after 12 days.
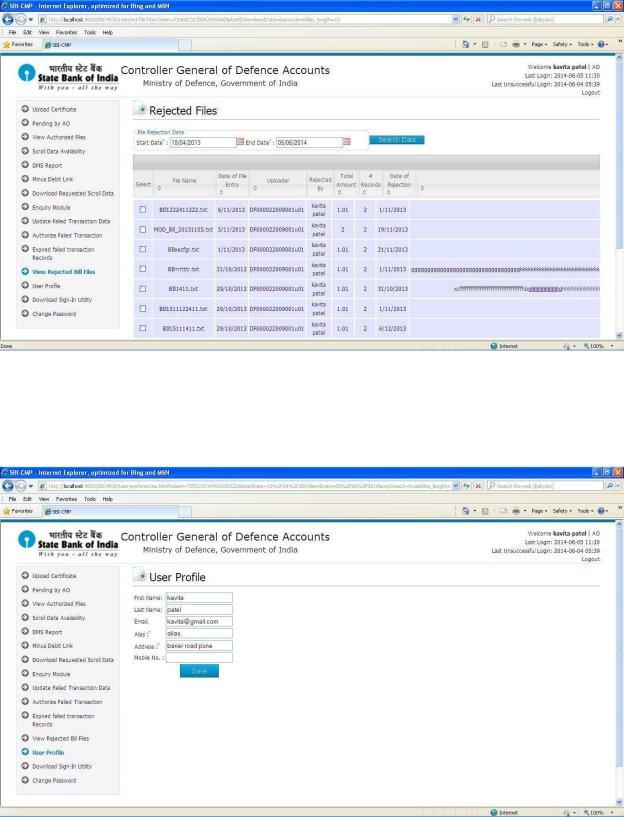
14.AO User – View Rejected Bill Files:
AO User clicks on the ‘View Rejected Bill Files’ Link to view/download rejected bill
files whose CDA & Sub-office codes are same as in logged user.
∙AO user can select the date range from ‘Start Date’ and ‘End Date’ and then clicks on ‘Search Data’ button to view rejected bill files.
∙AO user can select one or multiple bill files and clicks ‘Download Selected Files’ button to download them.
15.AO User – User Profile:
AO User clicks on “User Profile” to update his/her profile as shown below.
16.AO User – Download Sign-In Utility:
This link is explained in digital signature section.
For any help please refer Digital Signature -> AO user point -5
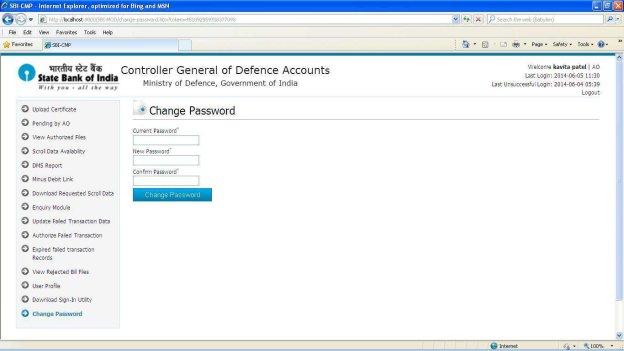
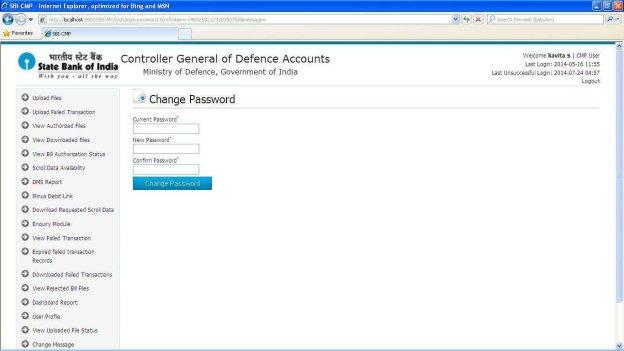
17.AO User – Change Password:
AO User clicks on “change Password” to change the Password.
AO Uploader (Accounts Officer Uploader)
1.The Accounts Officer/s uploader (AO Uploader) will login to the system with the Login Credentials provided to them
2.After successful login AO uploader user shall see the Landing page – Upload File
3.AO Uploader– Upload File:
∙AO Uploader clicks on the “Upload Files” where the user can browse, select and upload the Bill file.
∙Check the status of uploaded bill file in “Uploaded File Status” link.
∙AO Uploader can upload a bill file whose CDA & Sub-office codes are same as logged user.
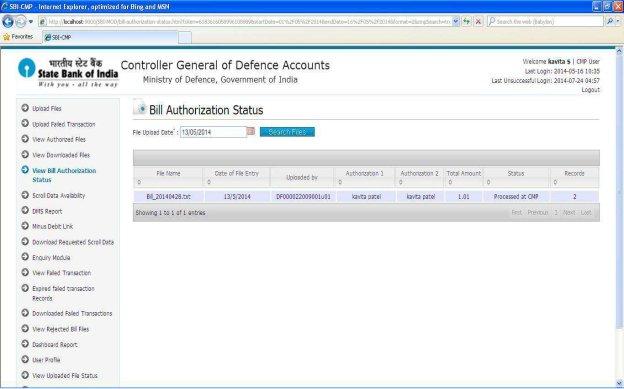
4.AO Uploader – View Bill Authorization Status:
AO Uploader clicks on the “View Bill Authorization Status” to view the status of bill files whose CDA & Sub-office codes are same as logged user.
∙AO Uploader user can select the date and then clicks on ‘Search Data’
button to view the status of bill files on that date.
∙AO Uploader can select one or multiple files and clicks ‘Download Selected
Files button to download them.
5.AO Uploader – Scroll data Availability:
This link is same as AO user scroll data availability. For any help please refer AO user point -6
6. AO Uploader – DMS Report:
This link is same as AO user scroll data availability. For any help please refer AO user point -7
7.AO Uploader – Minus Debit Link:
This link is same as AO user minus debit link. For any help please refer AO user point -8
8.AO Uploader – Download Requested Scroll Data:
This link is same as AO user download requested scroll data.
For any help please refer AO user point -9
9.AO Uploader – Enquiry Module:
This link is same as AO user enquiry module.
For any help please refer AO user point -10
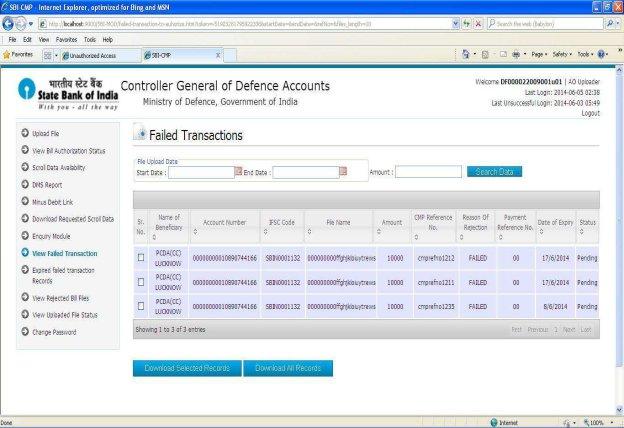
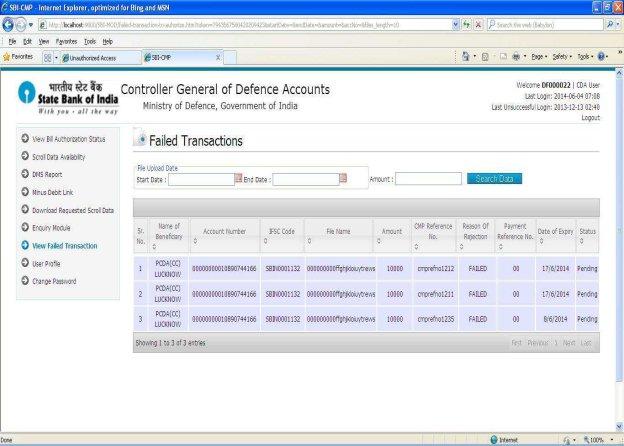
10.AO Uploader – View Failed Transaction Data:
AO Uploader clicks on the ‘View Failed Transaction’ Link to view un-edited failed transaction data whose CDA & Sub-office codes are same as logged user.
∙AO Uploader can select the date range from ‘Start Date’ and ‘End Date’ and then clicks on ‘Search Data’ button to view failed transaction data.
∙AO Uploader can search failed transaction data by amount.
∙AO Uploader can select one or multiple failed transaction records and clicks
‘Download Selected Records’ button to download them.
∙AO Uploader can download all failed transaction records by clicking
‘Download All Records’.
11.AO Uploader – Expired Failed Transaction Records:
This link is same as AO user expired failed transaction records. For any help please refer AO user point -13
12.AO Uploader – View Rejected Bill Files:
This link is same as AO user view rejected bill files.
For any help please refer AO user point -14
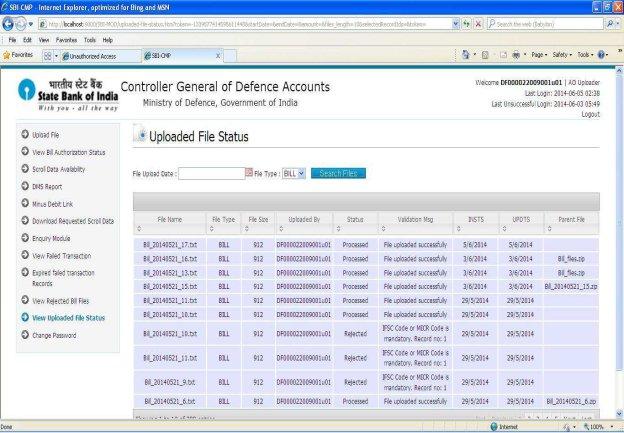
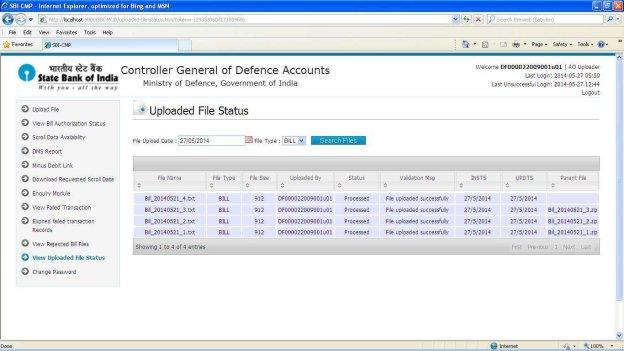
13.AO Uploader – View Uploaded File Status:
AO Uploader clicks on “Uploaded File Status” to check the status uploaded file.
∙CMP user can select the date ‘Upload Date’ & File Type ‘BILL and then clicks on ‘Search Data’ button to see the status bill file for given date.
14.AO Uploader – Change Password:
This link is same as AO user change password.
For any help please refer AO user point -17
CMP User
1.CMP User logs in to the system with the Credentials provided to them
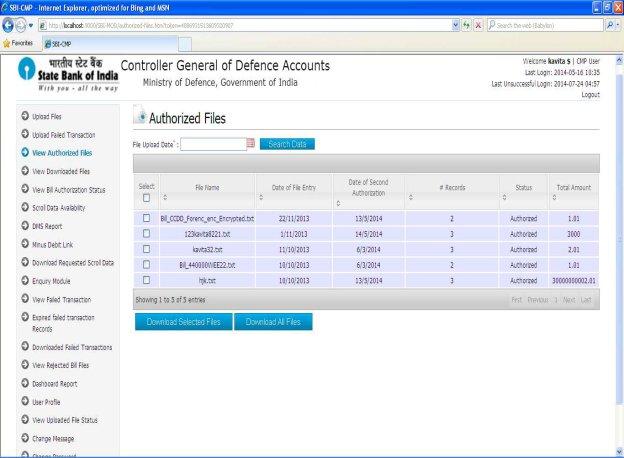
2.After Successful Login – CMP user shall view the “Authorized files” on the
lading page
∙CMP user displays all the authorized files i.e. all CDA & Sub-office Code combination files.
∙CMP User Clicks on the file to view all the records in the file
∙CMP user can select one or multiple files and clicks ‘Download Selected Files’ button to download them.
∙CMP user can download all authorized files by clicking ‘Download All Files’.
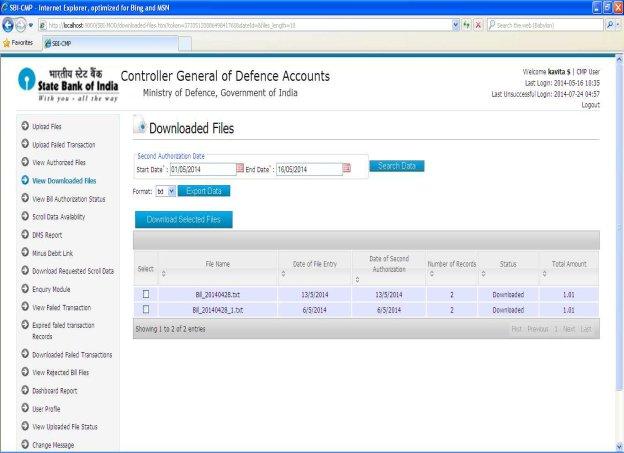
3.CMP User – View Downloaded Files:
CMP User clicks on the “View Downloaded Files” to view all the downloaded files i.e.
i.e. all CDA & Sub-office Code combination files.
∙CMP user can select the date range from ‘Start Date’ and ‘End Date’ and
then clicks on ‘Search Data’ button to see all the downloaded files in that date range
∙CMP user can download downloaded files.
∙CMP user can select one or multiple files and clicks ‘Download Selected
Files’ button to download them.
∙CMP user can export display data in txt or pdf file format.
4.CMP User – Upload Files:
∙CMP User clicks on the “Upload Files” where the user can browse, select and upload the Scroll or Settlement file.
∙After selecting file user will see two options in file type i.e. ’Scroll File’ and ‘Settlement File’.
∙Choose appropriate file type and start uploading scroll/settlement files.
∙Check the status of uploaded scroll/settlement file in “Uploaded File Status” link.
5.CMP User – Upload Failed Transaction:
∙CMP User clicks on the “Upload Failed Transaction” where the user can browse, select and upload the failed transaction file.
6.CMP User – View Bill Authorization Status:
CMP User clicks on the “View Bill Authorization Status” to view status of all the bill files i.e. all CDA & Sub-office Code combination files.
∙CMP user can select the date and then clicks on ‘Search Data’ button to see the status of all the bill files.
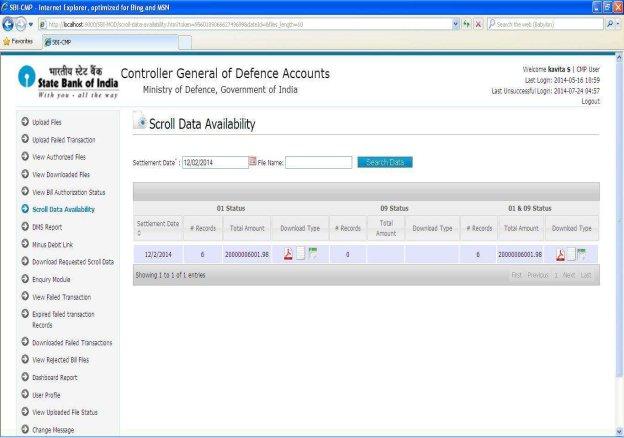
7.CMP User – Scroll Data Availability:
CMP User clicks on the “Scroll Data Availability” to view the scroll data of status 01
&09.
∙CMP user can select the date ‘Settlement Date’ or enter the file name (to search the scroll data based on the FILENAME) and then clicks on ‘Search
Data’ button to see the scroll data of settlement date.
∙For eg. If the user selects the date range as 20/09/2013 to 30/09/2013 and clicks on search scroll availability each day shows separately for the total amount and total no of records and a provision to download the scroll.
∙CMP user can send the request to download scroll data of status 01 & 09 date wise.
∙CMP user can download data in three different file types i.e. txt, csv, pdf.
∙CMP user can send one or multiple request to download scroll data.
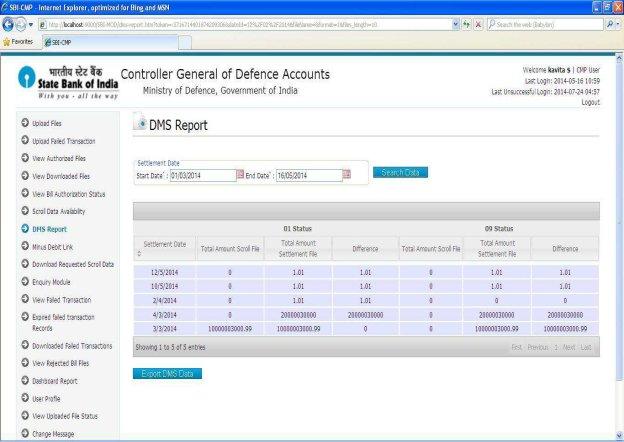
8.CMP User – DMS Report:
CMP User clicks on the “DMS Report” to view the Reconciliation report.
∙CMP user can select the date range from ‘Start Date’ and ‘End Date’ between 90 days and then clicks on ‘Search Data’ button to see the total amount of success transaction(01 status) and failed transaction(09 status) of scroll and settlement and difference between them.
∙CMP user can export dms data in pdf file format.
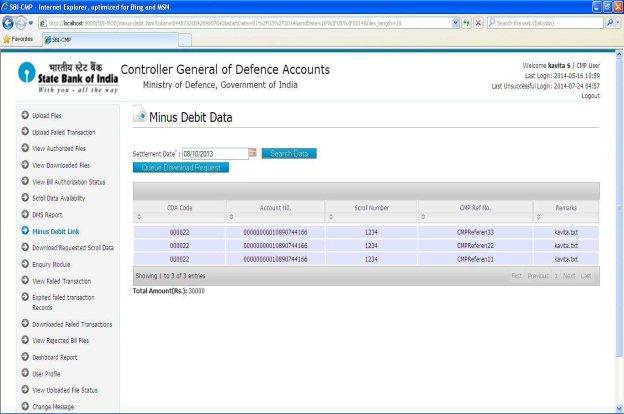
9.CMP User – Minus Debit Link:
CMP User clicks on the “Minus Debit Link” to view the scroll data of status 09.
∙CMP user can select the date ‘Settlement Date’ and then clicks on ‘Search
Data’ button to see the scroll data of status 09 for given settlement date.
∙CMP user can download scroll data of 09 status.
10.CMP User – Download Requested Scroll data:
CMP User clicks on the “Download Requested Scroll data” Link to download requested scroll data of status 01 & 09.
∙CMP user can select the date range from ‘Start Date’ and ‘End Date’ and then clicks on ‘Search Data’ button to see the status of requested scroll data.
∙CMP user can search requested data by reference no.
∙CMP user clicks on the “Download” button to download scroll data.
∙CMP user can view all the requests raised by logged user.
11.CMP User – Enquiry Module:
CMP User clicks on the “Enquiry Module” Link to view scroll data of status 01 & 09.
∙CMP user can select the date range from ‘Start Date’ and ‘End Date’ between 7 days and then clicks on ‘Search Data’ button to view scroll data of status 01 & 09.
∙CMP user enters amount or account number to search the scroll data based on the amount/account no.
12.CMP User – View Failed Transaction:
CMP User clicks on the ‘View Failed Transaction’ Link to view failed transaction data.
∙CMP user can select the date range from ‘Start Date’ and ‘End Date’ and then clicks on ‘Search Data’ button to view failed transaction data.
∙CMP user can search failed transaction data by amount/ status.
∙Status :
1.Un-Edited: CMP User can view unedited failed transactions.
2.Edited:
CMP User can view authorized failed transactions means updated by two AO users.
CMP user can select one or multiple failed transaction records and clicks ‘Download Selected Records’ button to download them.
CMP user can download all failed transaction records by clicking ‘Download All Records’.
3.Updated: CMP User can view updated failed transactions means updated by one AO User.
13.CMP User – Expired Failed Transaction Records:
CMP User clicks on the ‘Expired Failed Transaction Records’ Link to view expired
failed transaction data.
∙CMP user can select the date range from ‘Start Date’ and ‘End Date’ and then clicks on ‘Search Data’ button to view expired failed transaction data.
∙If failed transaction records are not authorized/updated then those records will expire after 12 days.
14.CMP User – Downloaded Failed Transaction:
CMP User clicks on the ‘Downloaded Expired Failed Transactions’ Link to
view/download downloaded failed transaction data.
∙CMP user can select the date range from ‘Start Date’ and ‘End Date’ and then clicks on ‘Search Data’ button to view downloaded failed transaction data.
∙CMP user can select one or multiple failed transaction records and clicks
‘Download Selected Records’ button to download them.
∙CMP user can download all downloaded failed transaction records by clicking
‘Download All Records’.
15.CMP User – View Rejected Bill Files:
CMP User clicks on the ‘View Rejected Bill Files’ Link to view/download rejected bill
files.
∙CMP user can select the date range from ‘Start Date’ and ‘End Date’ and then clicks on ‘Search Data’ button to view rejected bill files.
∙CMP user can select one or multiple bill files and clicks ‘Download Selected Files’ button to download them.
16.CMP User – Dashboard Report:
CMP User clicks on the ‘Dashboard Report’ Link to view count of files are uploaded,
Approved at first level, Authorized at second level and downloaded bill files.
∙CMP user can select the date range from ‘Start Date’ and ‘End Date’ and then clicks on ‘Search Data’ button each date shows count of files are uploaded, Approved at first level, Authorized at second level and downloaded bill files.
17. CMP User – User Profile:
CMP User clicks on “User Profile” to update his/her profile as shown below.
18. CMP User – Uploaded File Status:
CMP User clicks on “Uploaded File Status” to check the status uploaded file.
∙CMP user can select the date ‘Upload Date’ & File Type ‘SCROLL’ and then clicks on ‘Search Data’ button to see the status scroll file for given date.
∙If the scroll is not successfully processed then status of file is rejected and user can download log file by clicking ‘Download’ button in Log file column.
∙CMP user can select the date ‘Upload Date’ & File Type ‘SETTLEMENT’ and then clicks on ‘Search Data’ button to see the status settlement file for given date.
∙CMP user can select the date ‘Upload Date’ & File Type ‘REJECTED’ and then clicks on ‘Search Data’ button to see the status rejected file for given date.
19. CMP User – Change Message:
CMP User clicks on “change Message” to update message scrolling on home page.
20. CMP User – Change Password:
CMP User clicks on “change Password” to change the Password.
CDA ()
1.The CDA () will login to the system with the Login Credentials provided to them
2.After successful login CDA user shall see the Landing page – Scroll Data Availability
3.CDA User – View Bill Authorization Status:
CDA User can view the status of bill files whose CDA code is same as logged user.
∙CDA user can search files by sub-office code.
∙This link is same as AO Uploader bill authorization status. For any help please refer AO Uploader point -4
4.CDA User – Scroll data Availability:
CDA User can view the scroll data of status 01 & 09 whose CDA code is same as logged user.
This link is same as CMP user scroll data availability.
For any help please refer CMP user point -7
5.CDA User – DMS Report:
CDA User can view the Reconciliation report whose CDA code is same as logged user.
This link is same as AO user DMS report.
For any help please refer AO user point -7
6.CDA User – Minus Debit Link:
CDA User can scroll data of status 09 whose CDA code is same as logged user. This link is same as CMP user minus debit link.
For any help please refer CMP User point -9
7.CDA User – Download Requested Scroll Data:
CDA User can download requested scroll data of status 01 & 09. This link is same as AO User bill authorization status.
For any help please refer AO User point -9
8.CDA User – Enquiry Module:
CDA User can view the scroll data of status 01 & 09 whose CDA code is same as logged user.
This link is same as AO user enquiry module.
For any help please refer AO user point -10
9.CDA User – View Failed Transaction Data:
CDA User clicks on the ‘View Failed Transaction’ Link to view un-edited failed transaction data whose CDA code is same as logged user.
∙CDA User can select the date range from ‘Start Date’ and ‘End Date’ and then clicks on ‘Search Data’ button to view failed transaction data.
∙CDA User can search failed transaction data by amount.
10.CDA User – User Profile:
This link is same as AO user user profile link. For any help please refer AO user point -15
11.CDA User – Change Password:
This link is same as AO user change password. For any help please refer AO user point -17
CGDA ()
1.The CGDA () will login to the system with the Login Credentials provided to them
2.After successful login CGDA user shall see the Landing page – Scroll Data Availability
3.CGDA User – View Bill Authorization Status:
CGDA User can view the status of bill.
∙CGDA user can search files by cda & sub-office code.
∙This link is same as AO Uploader bill authorization status. For any help please refer AO Uploader point -4
4.CGDA User – Scroll data Availability:
CGDA User can view the scroll data of status 01 & 09.
∙CGDA user can search scroll data by cda code.
∙This link is same as CMP user scroll data availability. For any help please refer CMP user point -7
5.CGDA User – DMS Report:
CGDA User can view the Reconciliation report.
∙CGDA user can search reconciliation report by cda code.
∙This link is same as AO user DMS report.
For any help please refer AO user point -7
6.CGDA User – Minus Debit Link:
CGDA User clicks on the “Minus Debit Link” to view the scroll data of status 09.
∙CGDA user can select the ‘Settlement Date’ range from ‘Start Date’ and ‘End Date’ and then clicks on ‘Search Data’ button to see the scroll data of status 09 for given settlement date.
∙CGDA user can search scroll data by cda code.
∙CGDA user can send the request to download scroll data of status 09 date.
∙CGDA user can download data in pdf file.
∙CGDA user can send one or multiple request to download scroll data.
7.CGDA User – Download Requested Scroll Data:
This link is same as AO user download requested scroll data. For any help please refer AO user point -9
8.CGDA User – Enquiry Module:
This link is same as CMP user scroll data availability.
For any help please refer CMP user point -11
9.CGDA User – View Failed Transaction Data:
This link is same as CDA user view failed transaction data. For any help please refer CDA user point -9
10.CGDA User – User Profile:
This link is same as AO user user profile link. For any help please refer AO user point -15
11.CGDA User – Change Password:
This link is same as AO user change password. For any help please refer AO user point -17
Viewer User
1.The viewer user will login to the system with the Login Credentials provided to them
2.After successful login viewer user shall see the Landing page – Scroll Data Availability
3.AO User – View Bill Authorization Status:
This link is same as AO Uploader change password.
For any help please refer AO uploader point -4
4.AO User – Scroll data Availability:
This link is same as AO user scroll data availability.
For any help please refer AO user point -6
5.AO User – DMS Report:
This link is same as AO user dms report.
For any help please refer AO user point -7
6.AO User – Minus Debit Link:
This link is same as AO user minus debit link.
For any help please refer AO user point -8
7.AO User – Download Requested Scroll Data:
This link is same as AO user download requested scroll data.
For any help please refer AO user point -9
8.AO User – Enquiry Module:
This link is same as AO user enquiry module.
For any help please refer AO user point -10
9.AO User – View Failed Transaction Data:
This link is same as AO uploader view failed transaction data. For any help please refer AO uploader point -10
10.AO User – User Profile:
This link is same as AO user ‘User profile’. For any help please refer AO user point -15
11.AO User – Change Password:
This link is same as AO user change password. For any help please refer AO user point -17
Govadmin
1.The govadmin user will login to the system with the Login Credentials provided to them
2.After successful login govadmin user shall see the Landing page – User Management
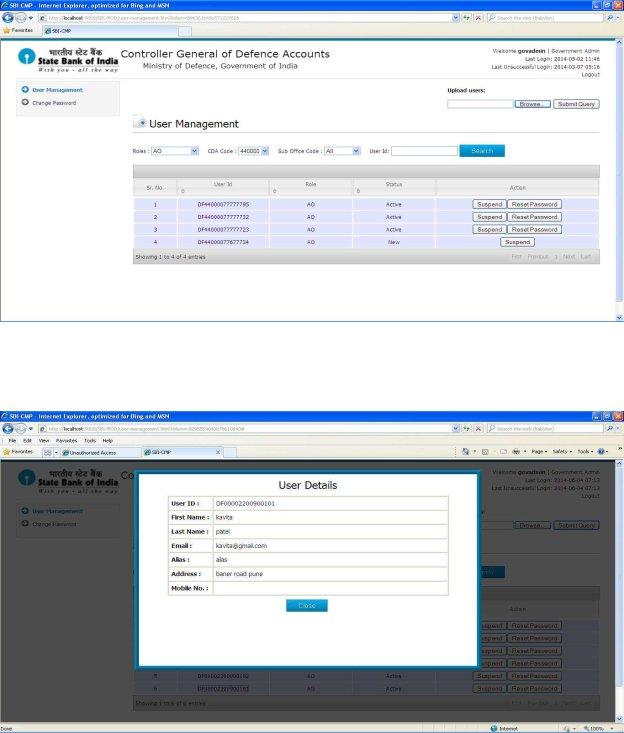
3.Govadmin User – User Management:
Govadmin User clicks on the “User management” where Govadmin user can browse, select and upload the user creation file (.csv file).
∙Govadmin user creates AO user and AO Uploader users.
∙Govadmin can search users by role, cda code, sub-office code, user id.
∙Govadmin user clicks on ‘Reset Password’ button to reset the user password.
∙Govadmin user clicks on ‘Suspend’ button to suspend user (disable user).
∙Govadmin user clicks on ‘Activate button to activate user
∙If the user is newly created status is ‘New’.
∙If the status of user is ‘New’. Application forces users to change the password. If user changed the password then status of that user is
‘Registered’. If user login to the system with new password, application forces user to fill user profile once it is done user is able to see all the link and status of that user is ‘Active’.
∙User can click on user Id to view profile.
4.AO User – Change Password:
This link is same as AO user change password. For any help please refer AO user point -17
SuperAdmin
1.The superadmin user () will login to the system with the Login Credentials provided to them
2.After successful login superadmin user shall see the Landing page – User Management
3.Superadmin User – User Management:
Superadmin user creates CMP, CDA, CGDA, GOVADMIN and VIEWER users. This link is same as Govadmin user ‘user managememt’.
For any help please refer AO user point -17
4.Superadmin User – Change Password:
This link is same as AO user change password.
For any help please refer AO user point -17
Digital Signature:
Following document provides a detailed description of the digital signature functionality in the MOD portal. The screenshots and explanation shall help and assist AO and AO Uploader users who are using the Digital Signature. Following are the users used for the Digital Signature–
1.AO Uploader (Accounts Office Uploader)
2.AO (Accounts Officer)
Link to connect to the portal is - https://www.sbicmp.co.in/MOD
Layout of Home Page of MoD Portal for e-Payment use hosted by SBI-CMP
Layout of the Login Page where User-ID and password need to be input is as under
Normal Usage as per the Roles -
AO (Accounts Officer)
1.The Accounts Officer/s (AO) will login to the system with the Login Credentials provided to them
2.After successful login AO user shall see the Landing page – Pending by AO
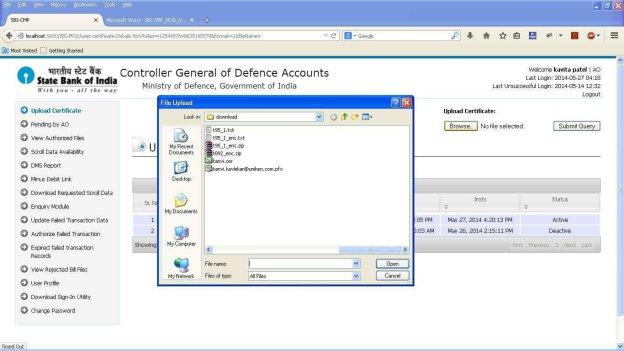
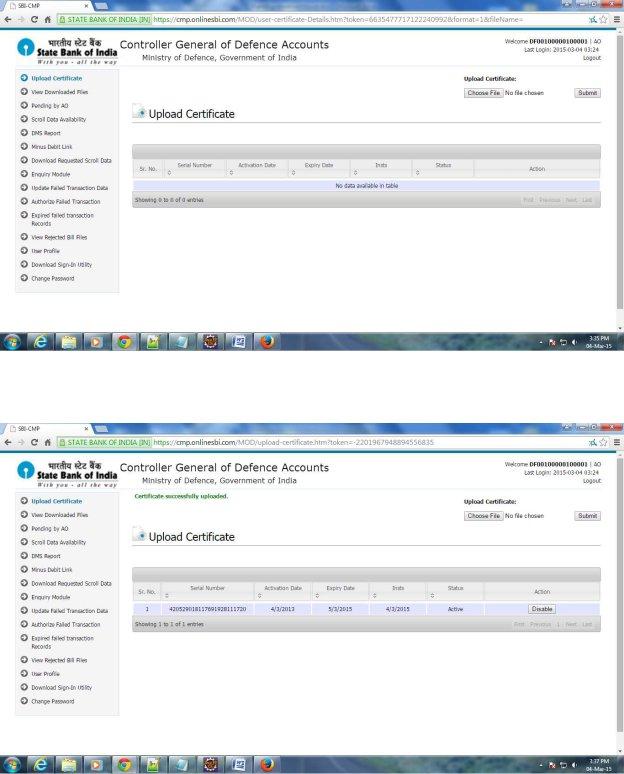
3. Upload Certificate:
AO User clicks on the “Upload Certificate” where AO user can browse, select and upload the Certificate file (.cer file).
4. AO user can see the uploaded certificate details like serial number, activation date, expiry date, INSTS, status.
The status of latest uploaded certificate is “Active” and all others are in “Deactive”
state.
5. Download Sign-In Utility
AO User download signature utility jar to generate signed bill file.
AO Uploader (Accounts Office Uploader)
1.AO Uploader will be logging to the system with the Login Credentials provided to them
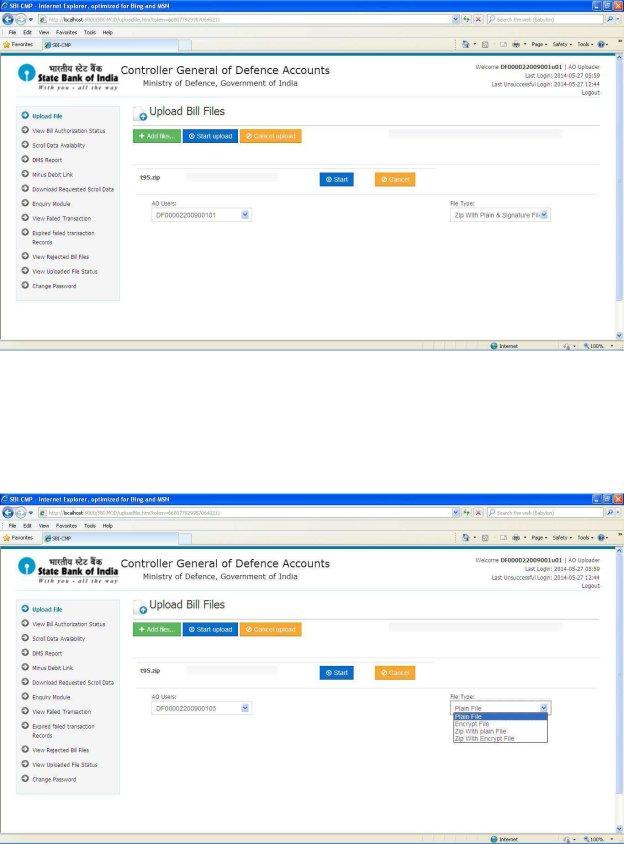
2.Once the AO Uploader logs in successfully – user can now browse, select and upload the Bill file.
∙If AO user upload bill file then he can see AO users list. Select AO user from dropdown for which you want to upload bill file.
∙If the certificate is shared by the selected AO user then user will see only two options in file type i.e ‘Zip With Plain & Signature’ & ‘Zip with Encrypt & Signature’.
∙If the certificate is not shared by the selected AO user then user will see four
options in file type i.e ‘Plain File’, ‘Encrypt File’, ‘Zip With Plain‘ & ‘Zip
with Encrypt ‘.
∙Choose appropriate file type and start uploading bill files.
∙Check the status of uploaded bill file in “Uploaded File Status” link.
Digital Signature User Manual
Following are the pre-requisite to use the digital signature:
1.USB Token or PFX file for signing data
2.User’s Pu li Key
3.Signature Utility
Following steps needs to perform in-order to use the digital signature for signing the data:
1.Extract the public key of AO User
2.Upload the Public Key of AO user
3.Download the Signature Utility
4.Generate the signature file
It is assumed that USB token is properly installed on the machine from which signature files needs to be generated. Kindly perform the below steps one by one:
1.Extract the public key of AO user:
∙Connect the USB token to the machine.
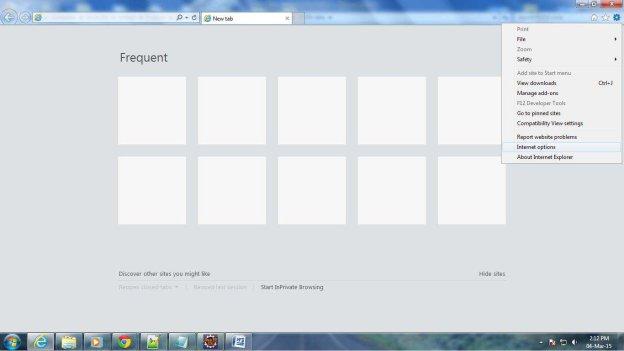
∙Open the internet explorer
∙Go to Internet Options from Tool
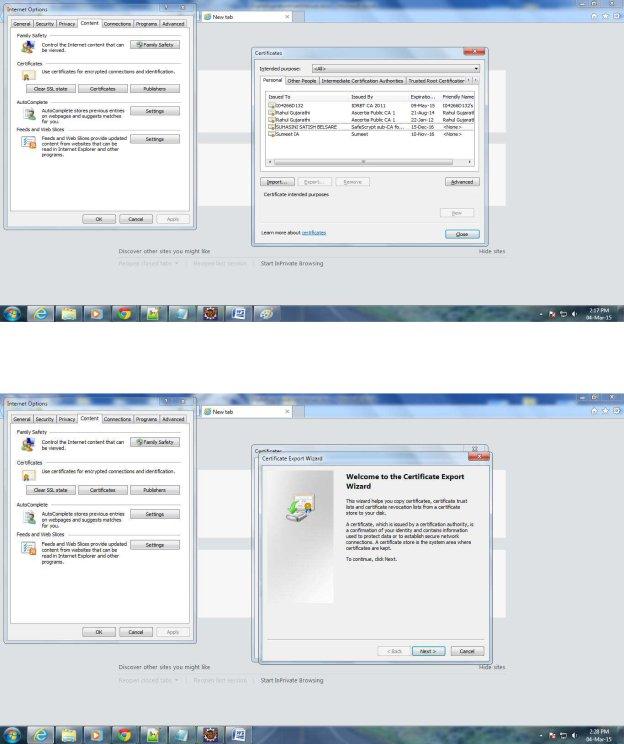
∙Go to Content tab and click on Certificates button to open the list of certificates pop up window.
∙Select the appropriate certificate from the list shown in pop up window and click on Export button to export the public key.
∙ Click on next button, select the option as No, do not e port the private ke from new pop up window.
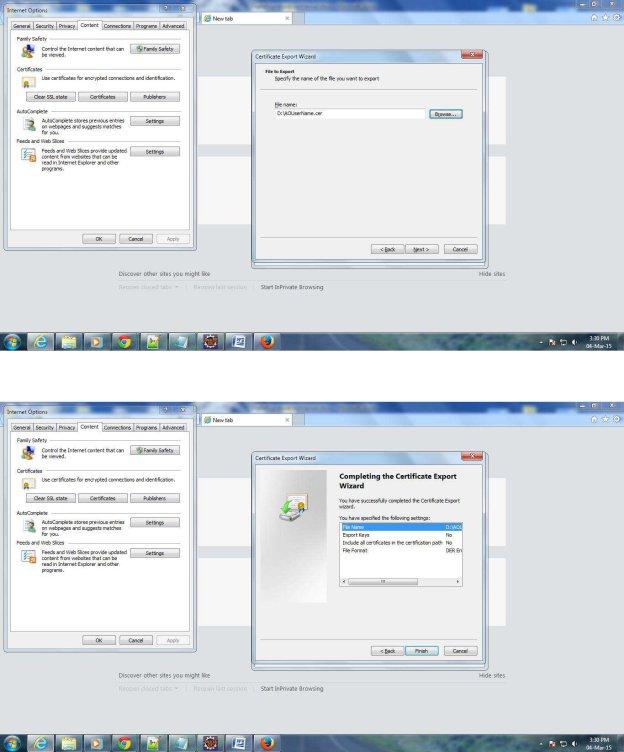
∙ Click on next button, select the option as DER en oded inar X.509 .CER from new pop up window.
∙Click on next button, enter the path and name for the file to be exported.
∙Click on next button, and then click on Finish button to finish the public key exporting.
Above is one time process only.
2.Upload the Public Key of AO User:
∙Login to MOD portal using AO user’s redentials.
∙Click on link Upload Certificate to go the page for uploading public key of user.
∙Select the public key of user by clicking on Choose File button.
∙Click on Submit button to upload the public key of user.
∙Once certificate is successfully uploaded, you can see success message and general information regarding the uploaded certificate like serial number, activation date, expiry date, status etc.
∙User can deactivate the current certificate by clicking on Disable button.
∙If AO user has uploaded the public key then up-loader for that CDA and Sub Office Code has to use the digitally signed files for uploading on portal. Other option will not be available to that user.
∙Above is one time process only.
3.Download the Signature Utility:
∙Login to MOD portal using AO credentials.
∙Click on Download Sign-In Utility for downloading signature utility.
∙Once user clicks on link, browser will ask user to save the utility.
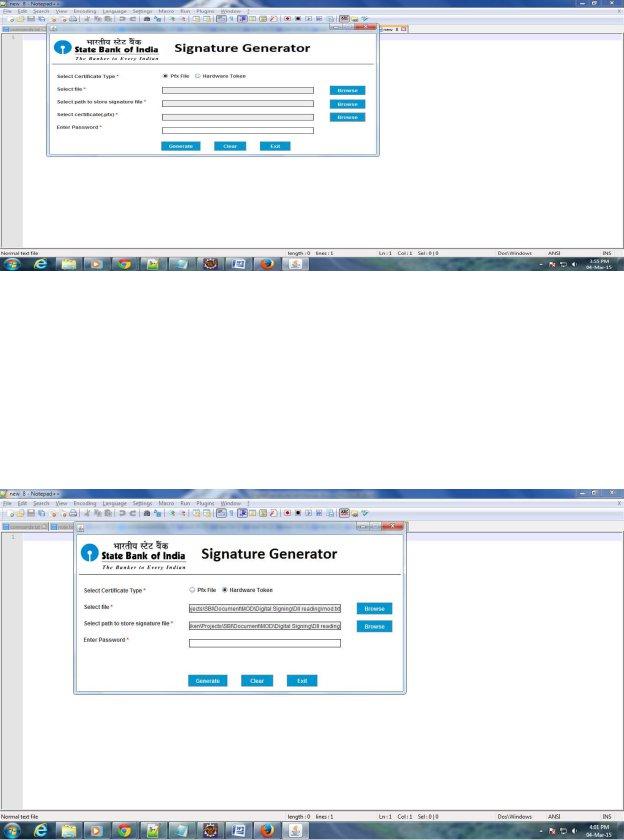
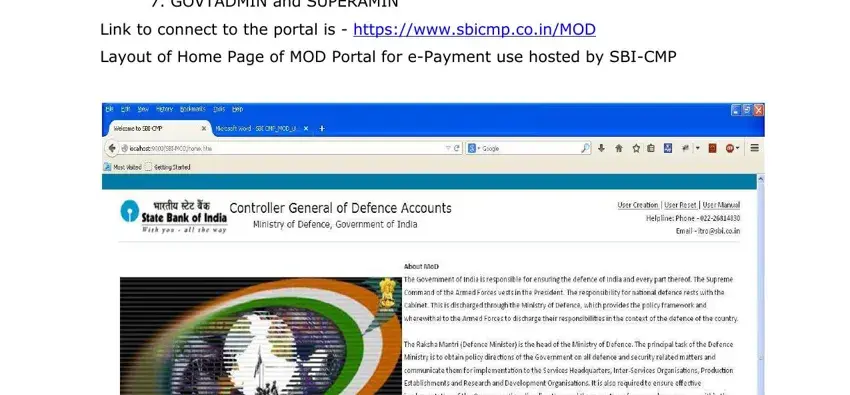
4.Generate the Signature File:
Follow below mention steps to digitally sign the plain or encrypted file which needs to be uploaded on portal.
∙If user has USB token for signing the file, then connect the USB token to the machine on which token is installed.
∙Now, run the signature utility which was downloaded in earlier step by double clicking on it.
∙Select the appropriate certificate type by selecting radio button. If user has PFX file for signing then select Pfx file as option else Hardware Token.
∙Select the file which needs to be digitally signed by by clicking on Browse button.
∙Select the path for storing the signature file by by clicking on Browse button. By default it will take the path where plain/encrypted file is stored.
∙If user has selected the Pfx file as certificate type, then user has to select the Pfx file by
li king on rowse utton. In ase of hardware token, use won’t see Sele t Certifi ate
option.
∙Enter the password of private key.
∙Click on Generate button to generate the digitally signed file.
∙After clicking on Generate button, user can see success message after successfully generating digitally signed file.
∙By above process, digitally signed zip file will be generated at destination path, which will be password protected so that nobody can modify the content of files inside the zip.
AO Up-loader will upload the generated zip file on MOD portal for further processing of file.