
A real estate power of attorney is a common but limited power of attorney that’s useful anytime you want someone else to deal with your real estate. A real estate POA isn’t difficult to put together, but you do need to be careful that you don’t give your attorney-in-fact more powers than you wanted to.
Last Updated: October 2026. This page now walks through the FormsPal real estate power of attorney template part by part, with a screenshot of each filled-in part.
Build Your Document
Answer a few simple questions to make your document in minutes
Save and Print
Save progress and finish on any device, download and print anytime
Sign and Use
Your valid, lawyer-approved document is ready
The sections below explain what a real estate POA is, when people use one, the risks to know about, and how to fill out the FormsPal template one part at a time.
In the most basic terms, a Real Estate POA is a form that gives someone else the right to buy and sell real estate in your name. They can also handle the management of your real estate and execute any additional powers you give them. Your free power of attorney form will give the chosen person, your attorney-in-fact, the right to act on your behalf unless and until you are incapacitated.
That’s because Real Estate POAs are almost never durable power of attorney forms.
So, while you do not have to be in the country or nearby for your attorney-in-fact to act on your behalf, they will not retain their power as your attorney-in-fact if you are incapacitated. You will also need a separate form if you’d like to create an agent with power of attorney for real estate after you’ve passed.
Your agent can be anyone you trust and who has the common sense to manage your real estate.
Before you choose, check that your candidate:
A Real Estate POA gives your attorney-in-fact the power to buy and sell real estate. They can also help manage your existing real estate, including making any important maintenance decisions you need.
A real estate POA is a good fit in situations like these:
The power of attorney for real estate transactions covers almost anything that can be done with your properties. Once granted, your attorney-in-fact can act without having to get the principal’s signature (your signature), so it’s doubly important to make sure that you trust the person you’re naming your agent.
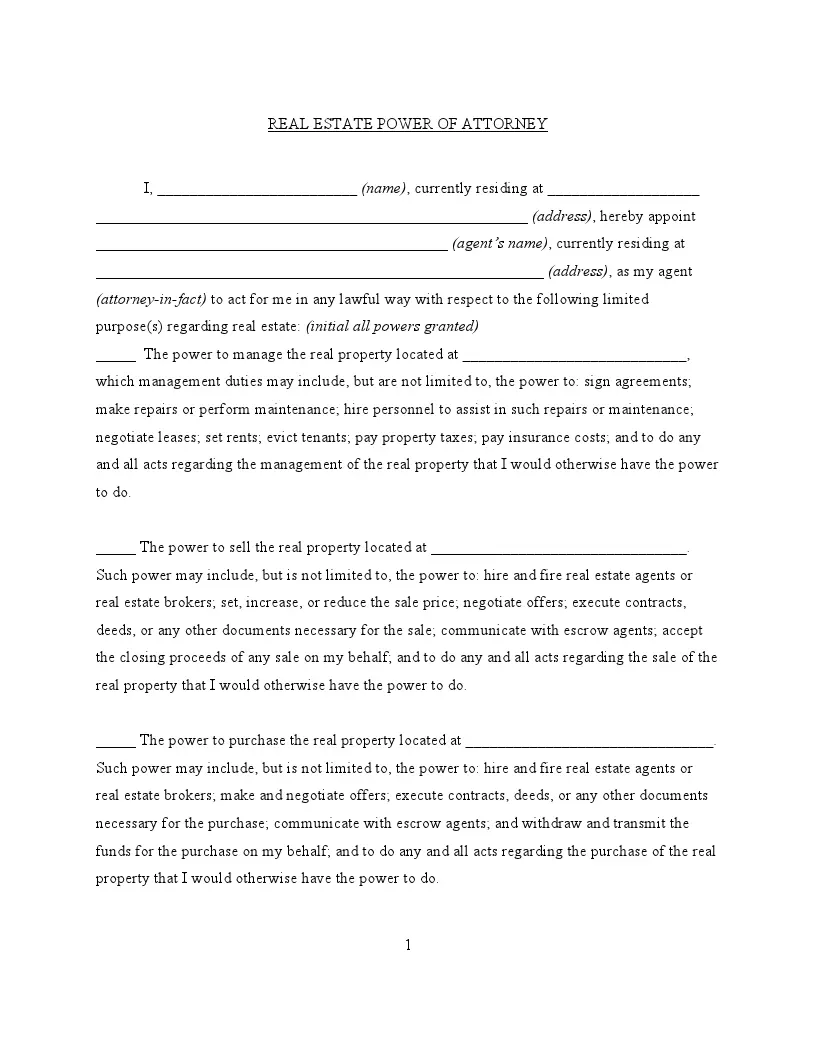
The FormsPal template has a line to initial for each power you want to grant:
| Document Name | Real Estate Power of Attorney Form |
| Other Names | Property Power of Attorney, House Power of Attorney |
| Where to File? | Can be attached to the property deed to reassure the title examiner. |
| Avg. Time to Fill Out | 10 minutes |
| # of Fillable Fields | 40 |
| Available Formats | Adobe PDF; Microsoft Word |
Getting a real estate POA is usually relatively simple, especially if you don’t need to customize it much. There are free real estate power of attorney forms to print, and those legal forms can be a great starting place.
You have two main ways to get one:
An attorney can customize the terms and authority provided by the document and can help you limit the power of your attorney-in-fact as needed. For instance, you may want to give your agent the authority to purchase and manage your properties without authorizing the sale of real estate.
Your attorney-in-fact has a fiduciary responsibility to act in the principal’s best interests. That means that as principal, your agent cannot just take the money and run without executing their responsibilities.
Despite those legal requirements, there are risks in creating a power of attorney, and real estate agents tend to look very closely at POA in case the document isn’t entirely legal or isn’t being executed in a reasonable manner.
There are even some real estate companies that will not allow real estate closing without the principal’s signature. One of the most common questions you’ll see is why the POA is involved in the first place and if it was made without coercion.
If the company you’re working with doesn’t want to work with your agent, you may have no option but to come and sign their documents in person.
The opposite situation can also cause problems. If your agent purchases or sell your property without your permission, including if they’ve sold it below market value, you may not have many legal options. As principal, you’ve authorized your agent to act on your behalf, and as long as they have not gone beyond the authority you’ve given them, you aren’t protected from their bad decisions.
Here are a few more examples of problems that might arise with a real estate attorney-in-fact:
One common problem in the real estate industry is caregivers coercing a family member into giving them POA to sell a property they don’t want to be sold or to free up financial resources for their care.
The combination of those problems means that it may take some time to establish your agent and work with local real estate companies to know that your agent is authorized to use the power you give them.
One exception is military POA. In the case of military deployment, a soldier can designate an agent and those POAs are almost always accepted and considered valid.
Before you sign, talk to the real estate company, bank or title office that will handle the sale. Ask what they want to see in a POA so your agent is not turned away at closing.
It’s a good thing that POAs are looked at carefully before they are accepted, but it can cause some problems if you don’t know how to avoid those hiccups. Worse, if you can’t get problems with a POA settled ahead of time, you might lose out on a sale.
The first tip is that your agent should never represent themselves as the person buying or selling a home. Before you enter into any negotiation, your agent must say that they are acting as a power of attorney.
Disclosing that early does a couple of things. It gives the real estate agent more confidence that they are working with an agent acting in good faith. It also gives them time to back out of a sale or tell your agent that they would need the principal’s signature before continuing.
It also protects your agent. If they hire a contractor to repair one of your properties, for instance, they are not liable for the costs of that repair if they say that they are using a power of attorney to hire the contractors on your behalf. Otherwise, they might get hit with a bill in your place.
Many companies will not honor a POA that was not created in their office since they want to be sure that there isn’t something wrong with it.
If you’re moving, leaving the country on vacation, or otherwise know that you will not be available for an important sale or transaction, it’s a good idea to schedule to create a POA with the real estate company there as a witness.
Doing this helps your agent get the trust they need from the company and helps reduce the liability risk for both the company and your agent moving forward. They may also ask that you use specific rules and limitations in your POA to help protect all parties involved.
It’s possible that they may ask for a limited POA that expires after the specified transaction is complete. Usually, it’s better to go ahead and use the limited POA instead of asking for a regular POA or a durable POA since the company may not honor the same form in the future.
These steps follow the FormsPal template this page hands out, which has four pages and 40 fillable fields. Download the PDF and fill it in with the PDF editor, or print it and write your answers by hand. Work through the parts in order.
Before you start, gather these details:
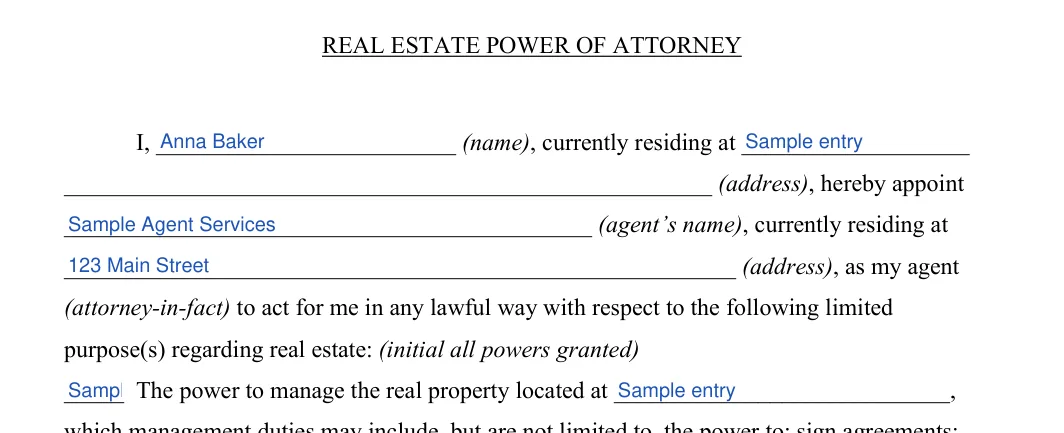
The screenshots under each step show the FormsPal Real Estate Power of Attorney template filled with sample entries in blue, so you can see where each answer goes. The names, addresses, dates and amounts are examples only.
Step 1: Appointment and Power to Manage
Start with the opening paragraph. Write your full legal name and address, then your agent’s name and address. You can also choose to include other contact information as needed, but it’s not legally required.
Next, initial the first power if you want your agent to manage your property, and write the property address on its “located at” line. You can add to those properties later on, but you will need to sign the updated document and may need to sign in front of a notary public to certify the additions.

Step 2: Power to Sell
Initial this line if you want your agent to be able to sell the property, then write the property address on the “located at” line. Leave the line blank if you do not want to grant this power.


Step 3: Power to Purchase
Initial this line if you want your agent to be able to buy property for you, then write the address of the property to be purchased. Leave the line blank if you do not want to grant this power.

Step 4: Power to Rent
Initial this line if you want your agent to be able to rent the property, then write the property address. Leave the line blank if you do not want to grant this power.

Step 5: Power to Refinance
Initial this line if you want your agent to be able to refinance the property, then write the property address. Leave the line blank if you do not want to grant this power.

Step 6: Other Powers
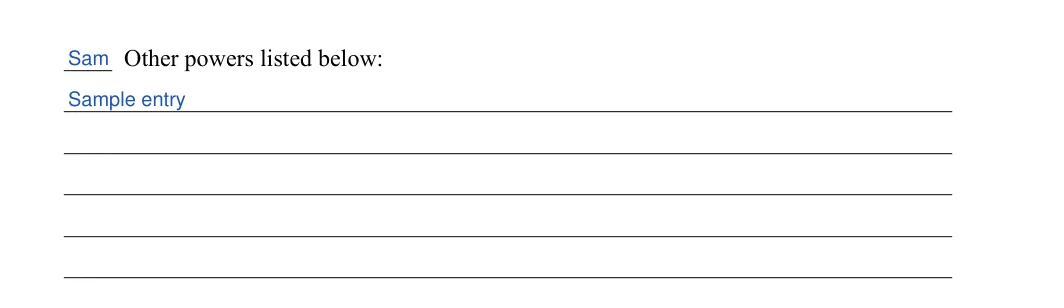
Initial the “Other powers listed below” line to add a power that the template does not list, then write it on the blank lines underneath. The five lines are for any power you want to add. The printed Special Instructions text that follows has no blank to fill in.

Step 7: Effective Date
The printed sentence on the template starts the power right away and ends it at revocation, your death, or an end date you can write in. To add an end date, fill in the blank at the end of that sentence with the date and the year.

Step 8: Incapacity Choice: Continue
Next comes a choice about incapacity. Under “initial one choice below,” initial the first line if you want the power to stay in effect even if you become incapacitated. Remember that you must be of sound mind when you sign the form and that you may be considered incapacitated by a wide variety of illnesses and any injury that affects your ability to think and function, even if only temporarily.

Step 9: Incapacity Choice: Cease
Initial the second line instead if you want the power to end when you become incapacitated. Initial only one of the two lines.

Step 10: Successor Attorney-in-Fact
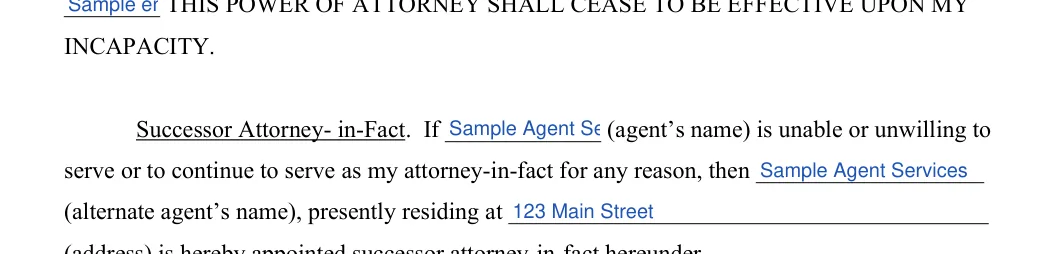
Write your agent’s name, then the name and address of your alternate agent. The alternate steps in if your first agent is unable or unwilling to serve. A successor gives you a backup if your agent is not available on the day of a sale. Leave these lines blank if you do not want to name one.

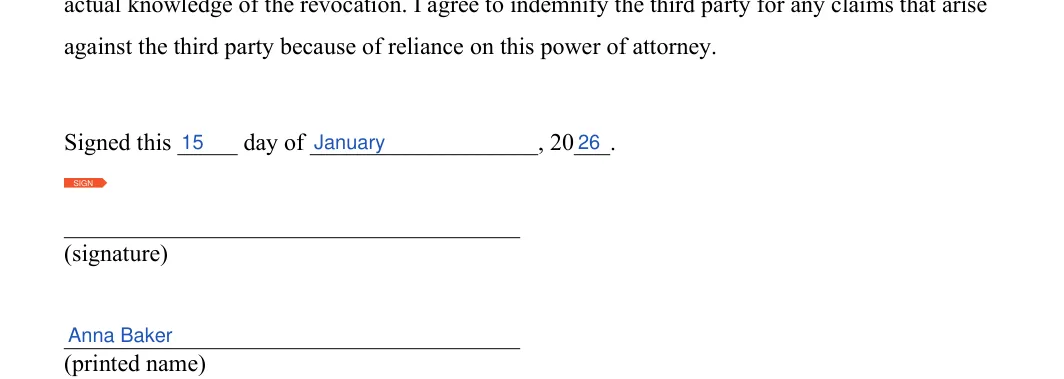
Step 11: Date, Signature and Printed Name
Fill in the day, month and year on the “signed this day” line. Then sign on the signature line and print your name under it.

Step 12: Acknowledgment
The last page holds the acknowledgment block. Its fields are the state, county, date, the officer’s name and title, your name, a signature and a seal.

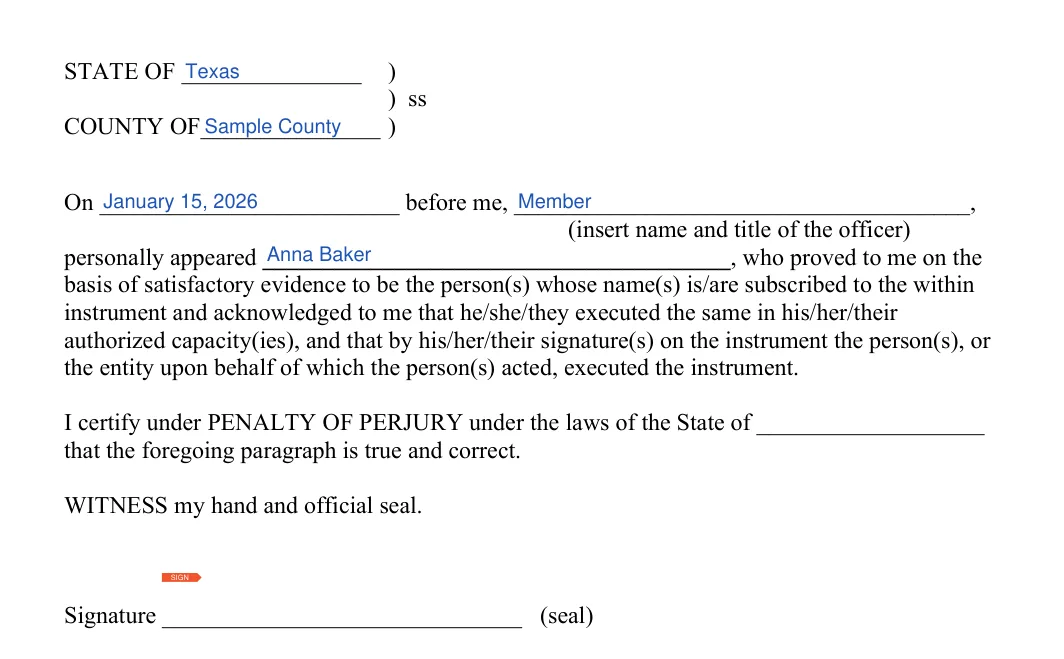
When the form is filled in, the next steps are signing it and sharing copies. You’ll also need to get your POA notarized in most states since it’s dealing with properties.
It lets you name an agent to act for you on property matters, such as managing, selling, buying, renting or refinancing real estate. You choose the powers by initialing them on the template.
The template has 40 fillable fields and takes about 10 minutes to fill out. Gather the names and addresses first so you can finish in one sitting.
Yes. The template has a successor attorney-in-fact part where you write the name and address of an alternate agent. Leave it blank if you do not want one.
Initial the line for each power you want to grant: manage, sell, purchase, rent or refinance. Use the other powers lines to add anything else, and leave the rest blank.
General information, not legal or tax advice.
