Texas Warranty Deed Form
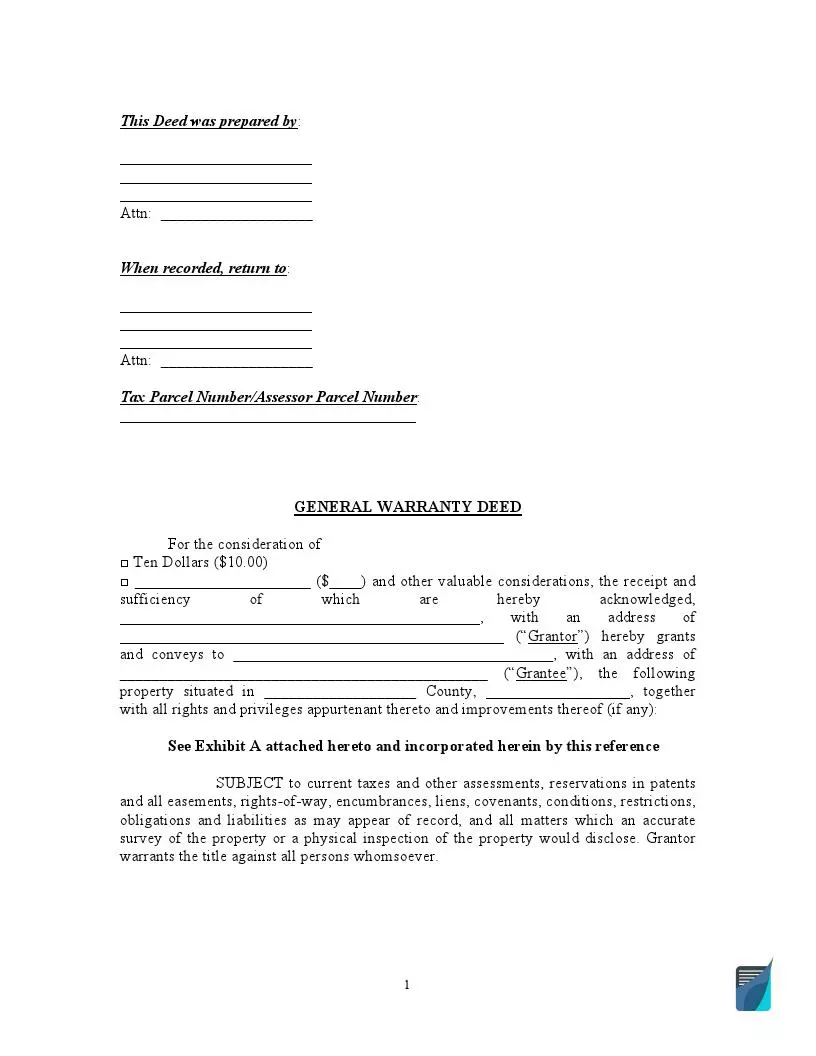
The Warranty Deed is used, among other documents, to process a real property purchase and sales transaction. This form aims to transfer ownership from the seller to the buyer.
This document has some particular features, as follows:
- Unlimited guarantee of property rights
- The current owner is legally responsible if title issues arise
- The form describes the property being passed
- The grantor promises that there are no hidden loans or other encumbrances imposed on the property
When drawing up the form, you need to use a special legal language. Thus, there is no point in compiling the document from scratch on your own; to trust the professionals. For instance, you can use the services of our form-building software.
Usually, a deed document is filled out when closing the deal.

Build Your Document
Answer a few simple questions to make your document in minutes
Save and Print
Save progress and finish on any device, download and print anytime
Sign and Use
Your valid, lawyer-approved document is ready
Warranty Deed Laws and Requirements in Texas
You need to look to the laws of Texas to get the warranty deed form right. Below is a summary of the laws related to the warranty deed form.
Laws
You may need to review Chapter 5 (Title 2) of the Texas Property Code to conduct the transaction legally. In Section 5.022, you will find a general provision for the warranty deed.
Signing requirements
Two witnesses must be present when signing the form, but a notary public can also replace them. The property seller and witnesses typically sign the document.
Filing requirements
The document should be registered with the County Clerk’s Office at the location of the real property.
Fees
You should also pay the County Clerk’s Office so they can complete their registration.
How to Fill Out and File a Warranty Deed in Texas
You can follow our guidelines for creating a warranty deed.
1. Download the Document
On our website, you will find an up-to-date document form that you can fill out.
2. Enter the Name of the County
You need to specify the county where the real property is located.
3. Enter the Name of the Seller
List the names of those selling the property.
4. Enter the Sum
Write the amount that the Grantor will receive for the sale of the property. First, write the amount in letters and then in digits using round brackets.
5. Enter the Buyer’s Name
Specify the name of the person who will receive the real property. You should also include the buyer’s address.
6. Specify the Property Type and Location
You need to give an address and a legal description of the property.
7. Date the Form
Enter the date, month, and year when the document is completed and signed.
8. Enter the Grantor’s Name
Again, you need to specify the grantor’s details:
- Name
- Title
9. Get the Required Signatures
Your witness or a notary public must complete the next paragraph and sign it.
10. Enter the Return Address
Once the document is registered with the County Clerk’s Office, it will be returned to the address you provide.
11. Send Out the Form
You need to pay the fee and send the form to the County Clerk’s Office for filing.