
The concept powering our PDF editor was to make certain it is as simple as it can be. You'll find the complete process of creating leatherman replacement trouble-free in case you follow these actions.
Step 1: The initial step would be to click the orange "Get Form Now" button.
Step 2: Now you're on the document editing page. You can modify and add content to the file, highlight specified content, cross or check certain words, add images, insert a signature on it, get rid of needless fields, or eliminate them altogether.
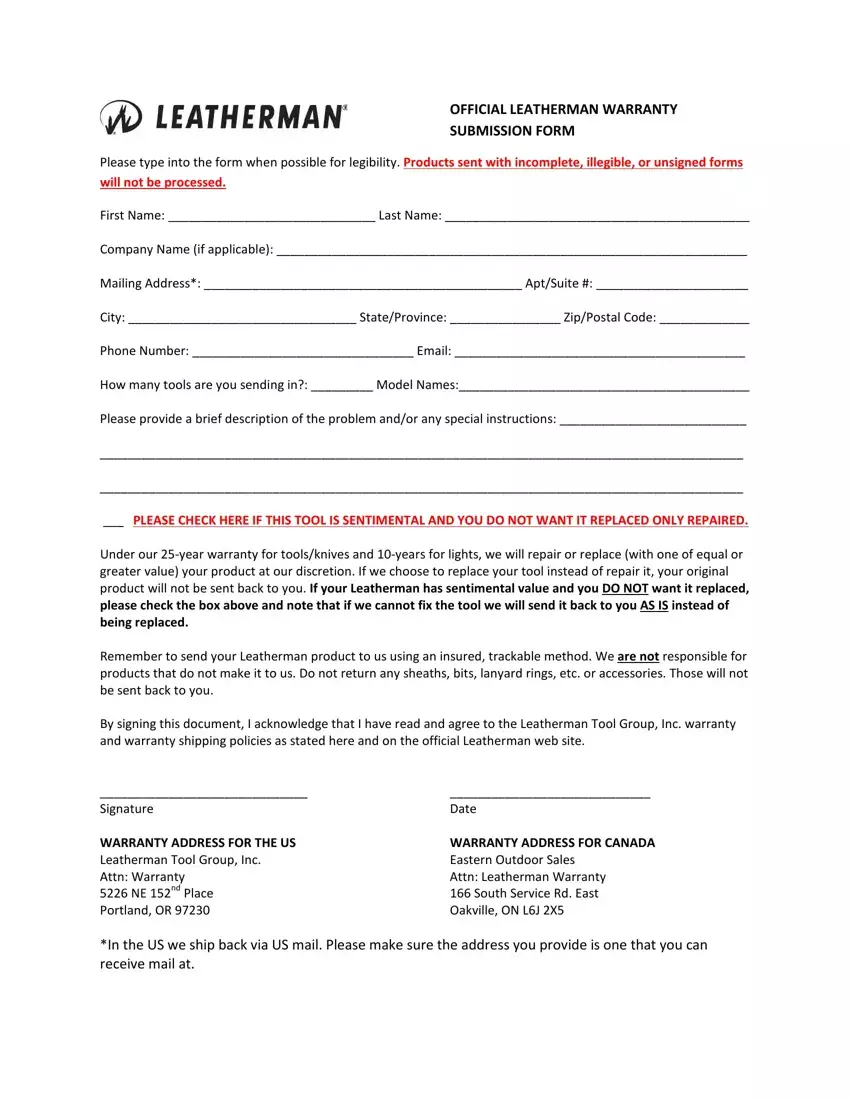
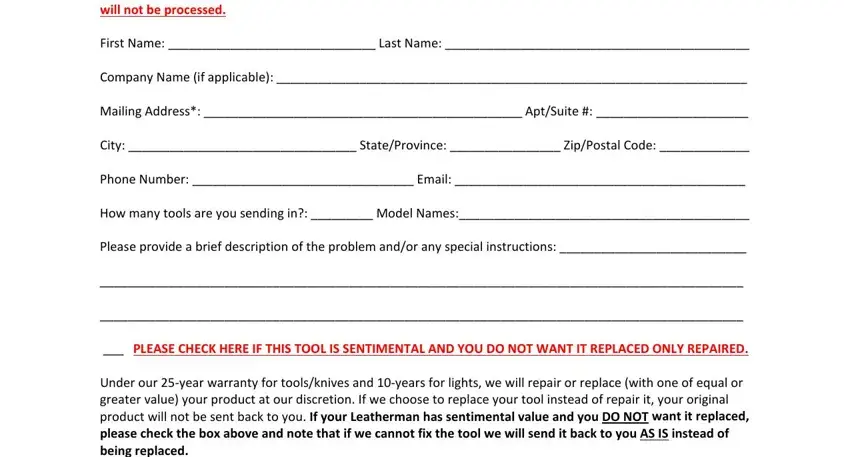
Type in the essential information in each segment to create the PDF leatherman replacement
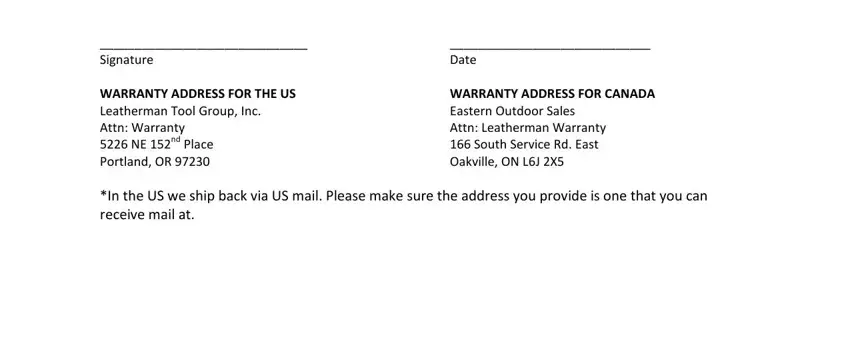
Include the essential data in the Signature, Date, WARRANTY ADDRESS FOR THE US, WARRANTY ADDRESS FOR CANADA, and In the US we ship back via US mail field.
Step 3: The moment you pick the Done button, your final file is readily exportable to all of your gadgets. Alternatively, you may send it using email.
Step 4: In order to avoid any type of difficulties later on, you should generate minimally several duplicates of your document.
