The Washington general financial power of attorney is a legal document that allows an individual (the “principal”) to appoint another person (the “agent” or “attorney-in-fact”) to manage their financial affairs. This can include various tasks such as accessing bank accounts, managing real estate transactions, handling investments, and dealing with taxes.
This type of power of attorney is considered “general” because it grants broad powers to the agent, allowing them to perform almost any act the principal could do themselves regarding financial matters. Unlike a durable option, a general power of attorney automatically terminates if the person granting powers becomes incapacitated or unable to make decisions themselves. This document is typically used for specific financial tasks when the principal is certain they will remain competent to handle their own affairs.

Build Your Document
Answer a few simple questions to make your document in minutes
Save and Print
Save progress and finish on any device, download and print anytime
Sign and Use
Your valid, lawyer-approved document is ready
In Washington State, the laws governing a general power of attorney are detailed under the Uniform Power of Attorney Act, specified in Chapter 11.125 RCW. This statute outlines the framework and specific requirements needed to establish a legally binding power of attorney. The act empowers an agent to perform a wide array of tasks on behalf of the principal, mirroring the principal’s own legal capacities. Agent authorities under RCW 11.125.260 include:
For a general power of attorney to be valid in Washington, specific signing requirements must be met as described in RCW 11.125.050. The document must be signed and dated by the principal, either notarized or witnessed by two or more individuals who meet certain criteria, ensuring they are not the principal’s caregivers or related to the principal or agent.
| Document Name | Washington General Power of Attorney Form |
| Other Name | Washington Financial Power of Attorney |
| Relevant Laws | Revised Code of Washington, Chapter 11.125 |
| Avg. Time to Fill Out | 10 minutes |
| # of Fillable Fields | 41 |
| Available Formats | Adobe PDF |
Creating a general financial power of attorney in Washington State allows you to designate an agent to manage your financial affairs This guide will walk you through the process of completing the form accurately to ensure that your financial matters are handled according to your wishes.
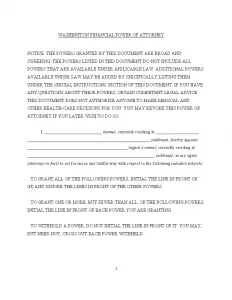
1. Read the Initial Notice Carefully
Begin by carefully reading the notice at the top of the form. This notice explains the broad and sweeping powers you are granting with this document and emphasizes that it does not authorize medical decisions. Understanding the scope and limitations of this document is crucial before proceeding.
2. Identify the Principal and Agent
Fill in your full name and current address where indicated at the beginning of the form. This identifies you as the principal. Next, appoint your agent by writing their full name and address. Ensure the person you choose is trustworthy, as they will have significant control over your financial matters.
3. Specify the Powers Granted
You must initial next to the specific powers you want to grant your agent. These powers range from real property transactions to tax matters. If you wish to grant all listed powers, simply mark next to the option (N) and skip the rest. If you choose specific powers, initial next to each corresponding letter. Avoid initialing powers you do not wish to grant.
4. Add Special Instructions
If you want to place any specific instructions or limitations on your agent’s powers, write them in the “Special Instructions” section. For example, include limitations on selling certain properties or making gifts.
5. Set the Effective and Termination Dates
Decide when the power of attorney will come into effect and when it will end. You can choose for it to be effective immediately or start on a future date. For termination, you can opt for a power of attorney to end on a specific date, upon your incapacity, or written revocation.
6. Sign and Date the Form
After completing the form, sign and date it in the presence of a notary public or two witnesses who meet the specified criteria.
7. Notarize the Document
Take the signed form to a notary public to have it notarized. The notary will verify your identity and your understanding of the document before witnessing your signature.
8. Distribute Copies
Once the form is completed and notarized, make copies for yourself, your agent, and any financial institutions where they will have the authority to act on your behalf.