New Hampshire Limited Power of Attorney Form
A New Hampshire limited power of attorney is a legal form that allows you to appoint another person to make decisions and take actions on your behalf, but only for specific tasks or during designated times. This document differs from a general power of attorney, which grants broad authority across various domains.
With a limited power of attorney, you might empower someone to oversee your property sales or handle your finances, but this power is narrowly defined and often temporary. It ensures your agent acts within confined boundaries, aligning with your needs and circumstances.
By the way, you can obtain New Hampshire power of attorney forms on our site to ensure your affairs are handled according to your wishes.

Build Your Document
Answer a few simple questions to make your document in minutes
Save and Print
Save progress and finish on any device, download and print anytime
Sign and Use
Your valid, lawyer-approved document is ready
Under the New Hampshire Revised Statutes, Chapter 564-E (Uniform Power of Attorney Act), particularly Section 564-E:105, the principal must have their signature on the power of attorney acknowledged in the presence of a notary public. This acknowledgment is essential for making the document legally binding.
The agent appointed in the power of attorney must adhere to specific duties outlined in Section 564-E:114, which include:
- Acting according to the principal’s reasonable expectations, or if unknown, in the principal’s best interests.
- Maintaining good faith in all actions taken.
- Operating strictly within the limits of the authority granted by the power of attorney.
These requirements and duties ensure that the agent’s actions align with the principal’s intentions and legal standards, preventing abuse of power and ensuring the principal’s assets and decisions are handled responsibly.
New Hampshire Limited Power of Attorney Form Details
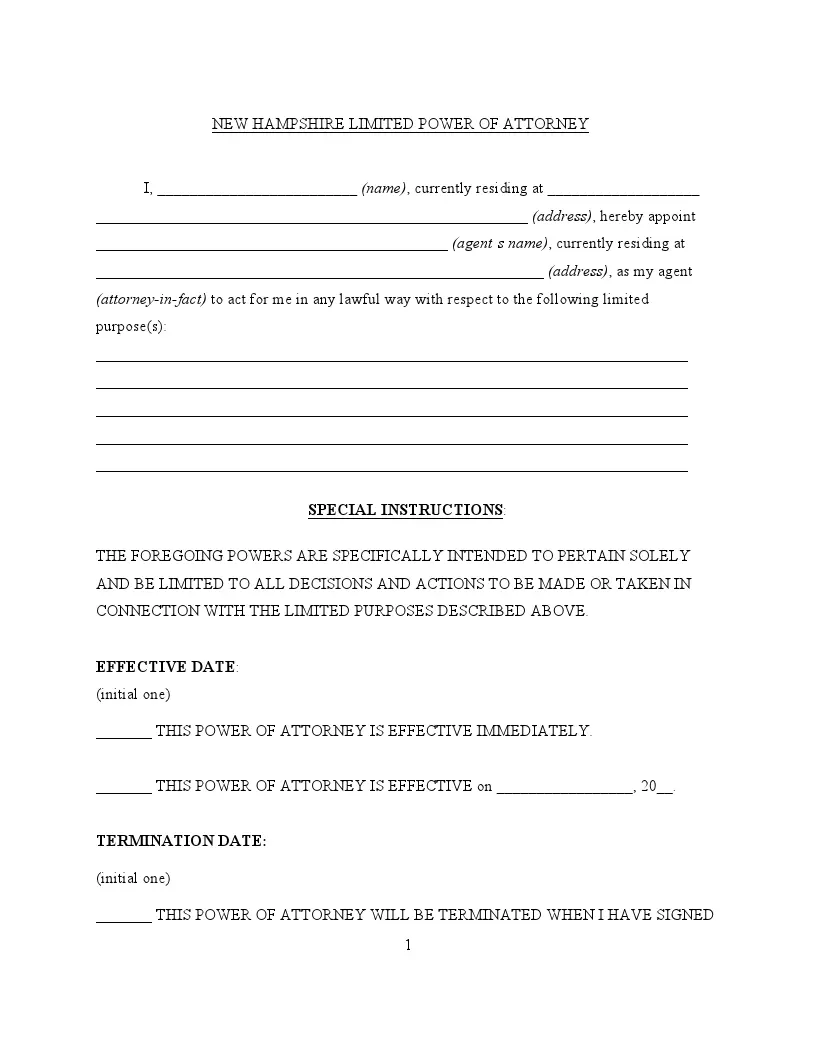
| Document Name | New Hampshire Limited Power of Attorney Form |
| Other Name | New Hampshire Special Power of Attorney |
| Relevant Laws | New Hampshire Statutes, Section 564-E:201 |
| Avg. Time to Fill Out | 8 minutes |
| # of Fillable Fields | 32 |
| Available Formats | Adobe PDF |
Filling Out New Hampshire Limited POA
A New Hampshire limited power of attorney must be completed accurately, ensuring all terms align with state laws. Below is a detailed guide on how to complete this form properly.
1. Understanding the Document
Before beginning, read through the entire form carefully. It contains critical information about the powers you are delegating and the conditions under which these powers will be exercised. Ensure you fully understand the scope and limitations of the authority you grant to your agent.
2. Fill in Your Personal Information
Start by entering your full legal name and complete residential address where indicated. This identifies you as the principal who authorizes someone else to take specific actions on your behalf.
3. Designate Your Agent
Identify the person you are appointing as your agent. Write their full name and provide their complete address. It’s crucial to appoint someone you trust, as they will be acting in your stead within the scope you define.
4. Specify the Powers Granted
List the specific powers you are granting to your agent. These should be detailed to prevent any misuse or overextension of authority. Common powers include handling financial transactions, managing real estate affairs, or making medical decisions, but you should tailor this section to your specific needs.
5. Set the Effective Date
Determine when this limited power of attorney will become effective. Some choose to have it activate immediately upon signing, while others may specify a start date or a triggering event (such as the principal’s incapacitation).
6. Acknowledge Revocation Rights
State that this limited power of attorney can be revoked by you at any time, ensuring that it’s clear this authority is under your control until your decision or your passing automatically revokes it.
7. Signatures and Notarization
Both you and your Agent must sign the form in the presence of a notary public to make it legally binding. The date of signing should be noted next to each signature:
- Principal’s signature. Sign your name and print it below the signature line.
- Agent’s signature. Have your Agent sign and print their name, ensuring they agree to act as your Attorney-in-Fact.
- Notarization. The notary will fill in the location and date, sign, and seal the document, confirming both identities and voluntary signatory actions.
By following these steps, you ensure that your intentions are clearly documented and legally upheld, allowing your agent to act within the bounds of authority you’ve comfortably set.
