Rhode Island Limited Power of Attorney Form
A Rhode Island limited power of attorney is a legal document that allows an individual (the principal) to appoint another person (the agent) to perform specific tasks on their behalf. This form is narrowly tailored to specific circumstances or transactions, such as managing real estate transactions, handling financial matters, or making other decisions during a specified period or event.
The limited power of attorney restricts the agent’s power to specific tasks, minimizing potential abuse. It expires either when the task is completed or on a specified date in the document, ensuring the principal retains control. If you need to create other specific documents in this state, check out all of our Rhode Island power of attorney templates.

Build Your Document
Answer a few simple questions to make your document in minutes
Save and Print
Save progress and finish on any device, download and print anytime
Sign and Use
Your valid, lawyer-approved document is ready
The signing requirements and laws for a limited power of attorney in this state are governed by Rhode Island General Laws, Chapter 18-16. According to § 18-16-2, the principal must sign the document in the presence of a notary public who acknowledges the signature. This ensures the principal’s identity is verified and the signing is voluntary and free from coercion. Key signing requirements include:
- The principal’s signature.
- Presence of a notary public.
- Notarial acknowledgment.
These steps ensure the document is legally binding and enforceable. Additionally, the limited power of attorney must clearly outline the specific powers granted to the agent, ensuring they are limited to the defined scope.
Rhode Island Limited Power of Attorney Form Details
| Document Name | Rhode Island Limited Power of Attorney Form |
| Other Name | Rhode Island Special Power of Attorney |
| Relevant Laws | Rhode Island General Laws, Chapter 18-16 |
| Avg. Time to Fill Out | 8 minutes |
| # of Fillable Fields | 32 |
| Available Formats | Adobe PDF |
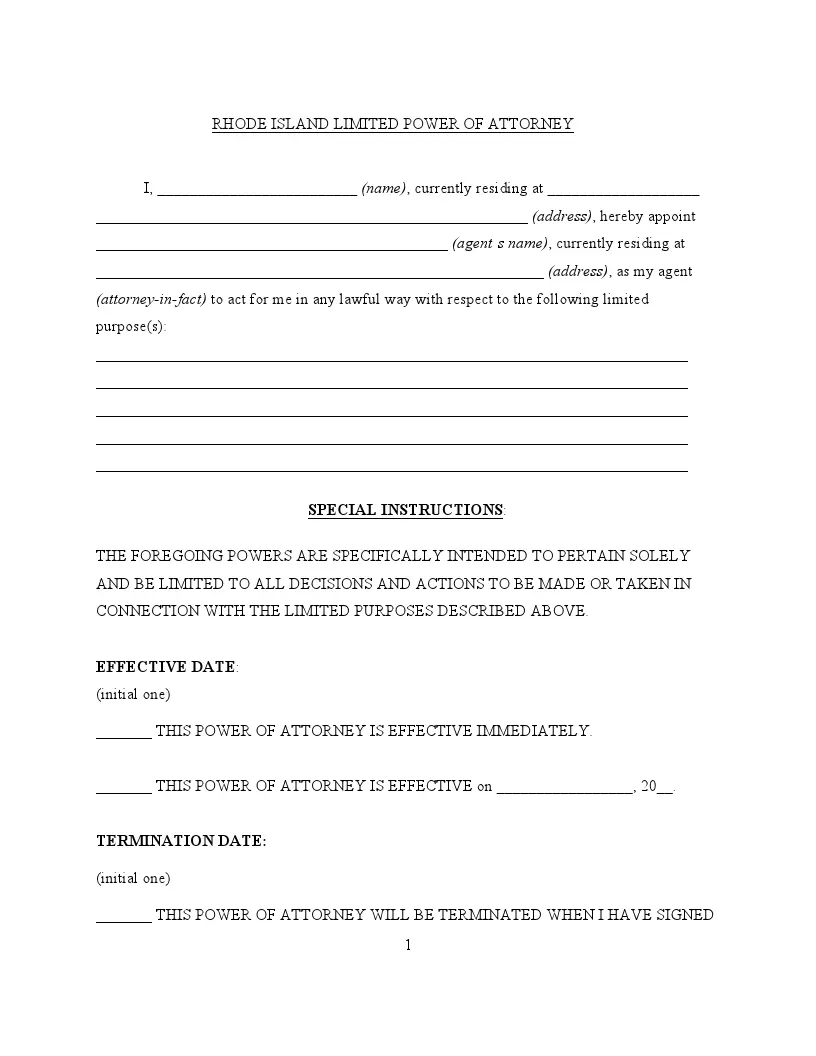
Filling Out Rhode Island Limited POA
Here’s a step-by-step guide to properly completing the Rhode Island limited power of attorney form, ensuring it meets legal standards and accurately reflects your intentions.
1. Enter Your Information
Start by filling in your full name and address in the designated fields. Ensure the information matches your identification documents.
2. Designate Your Agent
Appoint your trusted agent by writing their full name and address. This person will act on your behalf, so choose someone reliable and capable of managing the responsibilities you will assign to them.
3. Define the Powers Granted
Specify the powers you are granting to your agent. These should be detailed in the “Special Instructions” section of the form. Be as precise as possible to prevent ambiguity about your agent’s authority.
4. Set the Effective Date
Choose when the powers will become effective. If you want the limited power of attorney to start immediately, initial the corresponding option. Alternatively, you can specify a date for the powers to commence, useful for anticipated absences or events.
5. Decide on Termination Conditions
Decide how the power of attorney will end. You can opt for it to expire on a specific date, upon a written revocation by you, or if you are determined to be incapacitated. Initial next to the condition that applies.
6. Appoint a Successor Agent
If there is a chance your primary agent might not be able to fulfill their role, appoint a successor agent by providing their name and address. This way, you ensure continuity in managing your specified affairs without interruption.
7. Signature and Acknowledgment
Sign the document in the presence of a notary public on the specified date. Both your signature and the date are crucial for validating the form. The notary public will then complete their section, verifying your identity and the voluntariness of your signing.
8. Notarize the Document
Ensure that the notary public affixes their seal and signs the acknowledgment section of the form. This step legally acknowledges your identity and the authenticity of your signature, solidifying the document’s enforceability.
