Washington Limited Power of Attorney Form
A Washington limited power of attorney is a legal form that allows a person (the principal) to designate another individual (the agent) to perform specific actions or decisions on their behalf. A limited power of attorney specifies particular powers and may be restricted to a single transaction or set of actions. For example, the principal could authorize the agent to handle real estate transactions, financial decisions, or legal claims, but only within defined limits.
Use our Washington power of attorney forms if you need to draft state-specific documents.

Build Your Document
Answer a few simple questions to make your document in minutes
Save and Print
Save progress and finish on any device, download and print anytime
Sign and Use
Your valid, lawyer-approved document is ready
This form is used in Washington State and must comply with state laws, including those outlined in the Revised Code of Washington (RCW). The document should be clearly written and specify the exact powers granted and any limitations.
In Washington, the signing requirements and laws for a limited power of attorney are governed by the RCW, Sections 11-125-010 – 11-125-903 (Uniform Power of Attorney Act). This legislation outlines the necessary steps to ensure a legally valid form. When creating a limited power of attorney, the principal must sign and date the document. This signature must be:
- Acknowledged before a notary public.
- Attested by at least two competent witnesses.
These witnesses must not be the principal’s home care providers or care providers at any adult family home or long-term care facility where the principal resides. Additionally, they should not be related to the principal or the agent by blood, marriage, or state-registered domestic partnership.
Washington Limited Power of Attorney Form Details
| Document Name | Washington Limited Power of Attorney Form |
| Other Name | Washington Special Power of Attorney |
| Relevant Laws | Revised Code of Washington, Chapter 11.125 |
| Avg. Time to Fill Out | 8 minutes |
| # of Fillable Fields | 32 |
| Available Formats | Adobe PDF |
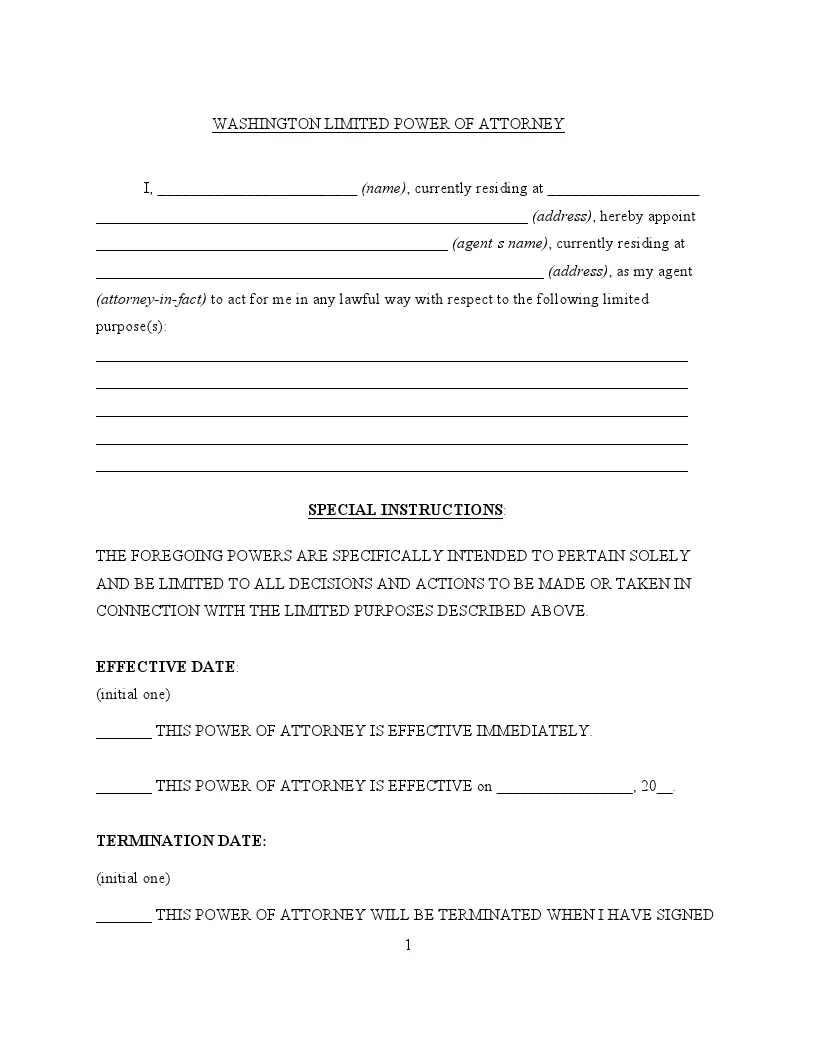
Filling Out Washington Limited POA
In Washington, the limited power of attorney must be completed accurately to ensure it is legally binding. This guide will walk you through each step of filling out the form correctly.
1. Principal’s Information
Begin by entering your full legal name and address in the designated spaces at the top of the form. This section identifies you as the principal granting the limited power of attorney.
2. Agent’s Information
Next, you must name the person you appoint as your agent. Write the full name of your chosen agent in the space provided. This individual will be given the authority to act on your behalf for the specific acts you outline.
3. Specific Acts
This section describes the specific acts or transactions you authorize your agent to perform. Be as detailed as possible to avoid any ambiguity. Examples might include managing a real estate transaction, handling a financial matter, or representing you in a legal proceeding.
4. Incidental Acts
The form includes a clause that allows your agent to perform any incidental acts necessary to carry out the specified tasks. Ensure you understand this provision, as it grants your agent additional authority to handle related matters.
5. Acceptance by Agent
Your agent must agree to accept the responsibilities outlined in the power of attorney. Although not explicitly required on this form, discussing the terms with your agent is advisable to ensure they are willing to act in your best interests.
6. Effective Date and Revocation
Indicate the date when the power of attorney will become effective. Note that this power of attorney can be revoked by you at any time and will automatically terminate upon your death. Ensure any parties relying on this document are informed of its revocation if you choose to withdraw the authority granted.
7. Principal’s Signature and Date
Sign and date the form in the presence of witnesses or a notary public. This step is crucial as it validates the document. Ensure the date is correctly entered to avoid any legal issues.
8. Witnesses
Two competent witnesses must attest to your signature. The witnesses must not be related to you or the agent and should not be your care providers. They must sign the form and provide their names in the spaces provided.
9. Notary Public
Although not always required, having the form notarized adds an additional layer of legal protection. The notary public will confirm your identity, witness your signature, and affix their seal to the document. Complete the “State of” and “County of” sections, and ensure the notary fills in their portion correctly.
