A Pre-Trip Inspection Checklist is a comprehensive tool used by drivers, especially those operating commercial vehicles, to perform a detailed safety check of their vehicles. This checklist includes various items to inspect, such as brakes, tires, lights, mirrors, and emergency equipment, to ensure everything is in good working order. Additionally, it covers the inspection of fluid levels, horns, wipers, and cargo securement. This systematic approach helps identify mechanical issues or safety concerns that could pose a risk during the trip.
A Pre-Trip Inspection Checklist is particularly important in the logistics and transportation industry, where the condition of the vehicle directly impacts operational safety and efficiency. The checklist helps maintain safety standards required by regulatory bodies and extends the vehicle’s life by ensuring regular inspections and maintenance.
Other PDF Forms
You will discover more editable PDF forms accessible here. Below, we selected some of the more popular PDFs available in this category. Moreover, do not forget that you may upload, fill out, and edit any PDF document at FormsPal.
Actually, as with any checklist, you do not have to write anything: you have to just mark the boxes that explain the state of your vehicle’s various parts. You must check everything attentively because it is your responsibility to drive safely and not to get stuck in the middle of nowhere, discovering that your vehicle cannot move anymore.
We offer to download a convenient pre-trip inspection checklist template using our form-building software. It is pretty straightforward because you have not only names of different vehicle parts but also pictures that will help you orientate if you have doubts. After you have gotten the template, proceed to our instructions below.
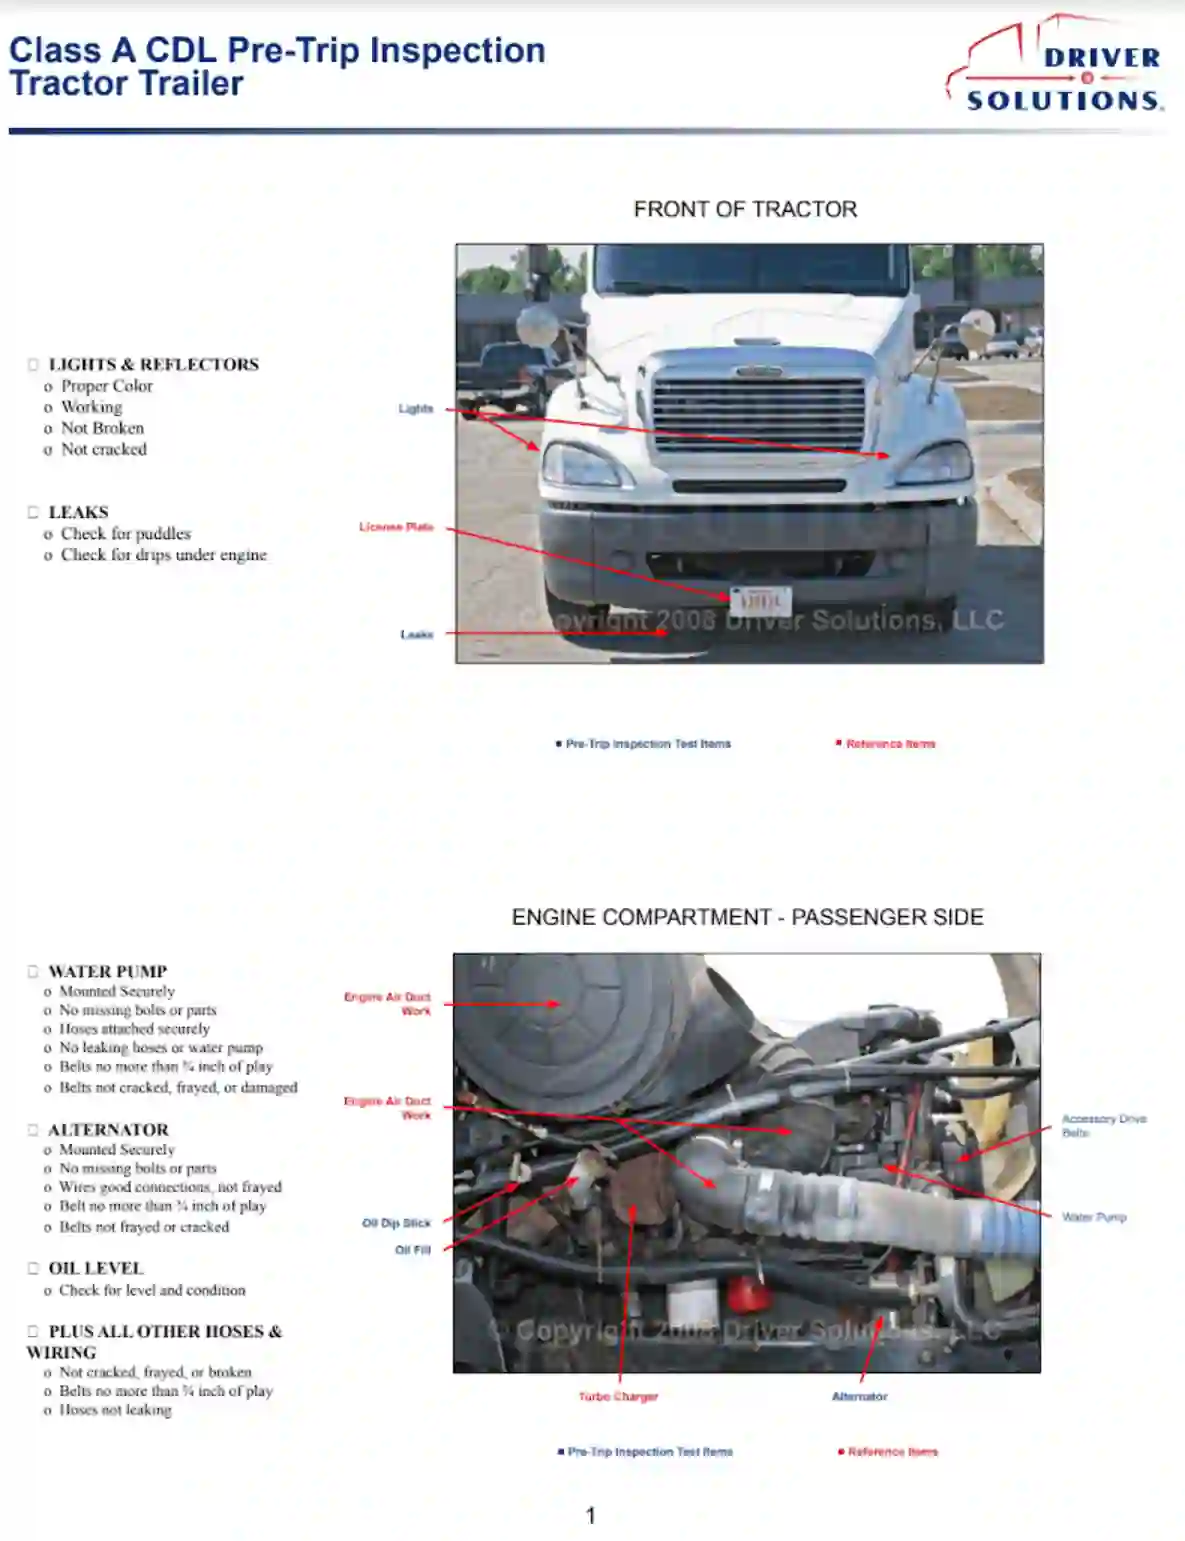
The inspection starts with observing your vehicle’s front: this is how you make your vehicle visible on the road for other drivers and police. Additionally, you can check if there are any leaks coming from the engine: for that, you have to look under the front.
Check if your license plate is readable, lights are working properly, and there are no leaks—Mark all the points in the checklist.
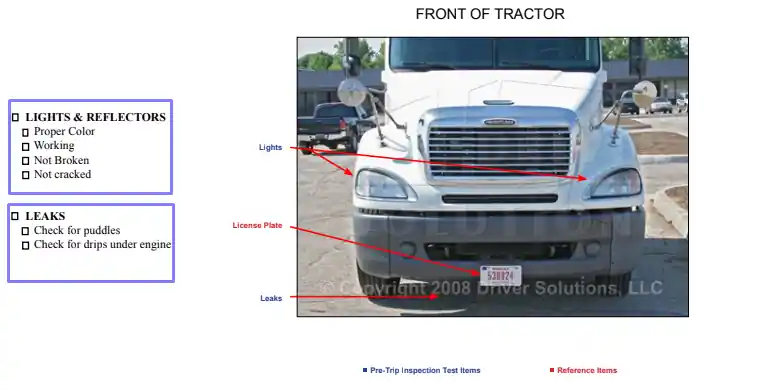
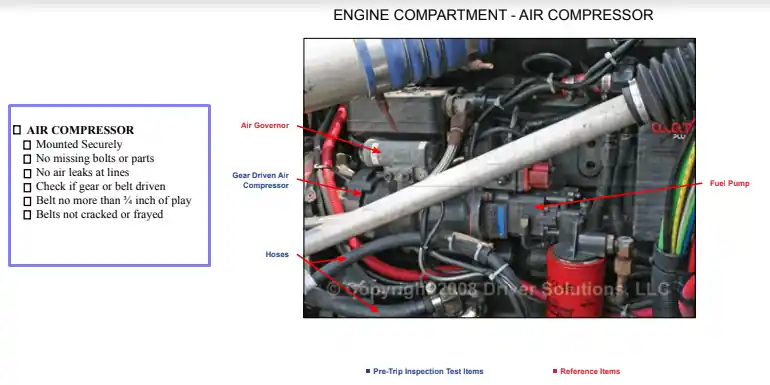
Then, the engine check must begin. Open the vehicle’s hood and start with the passenger’s side. Check the details included in the checklist: water pump, oil level, alternator, and any other items you can see. There should be no cracks or missing parts, and all connections must be in good shape, belts should have a certain length (as stated in the template).
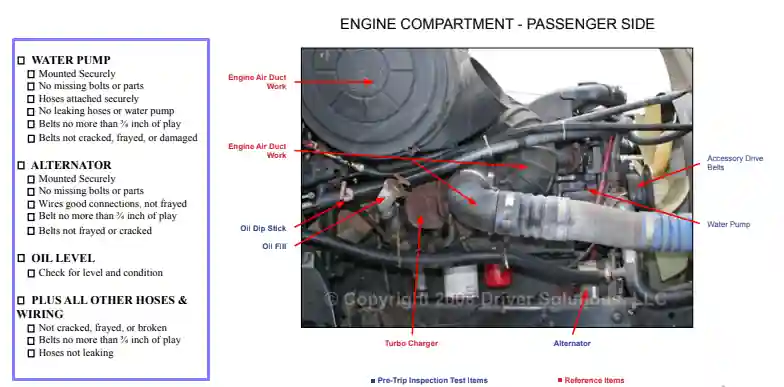
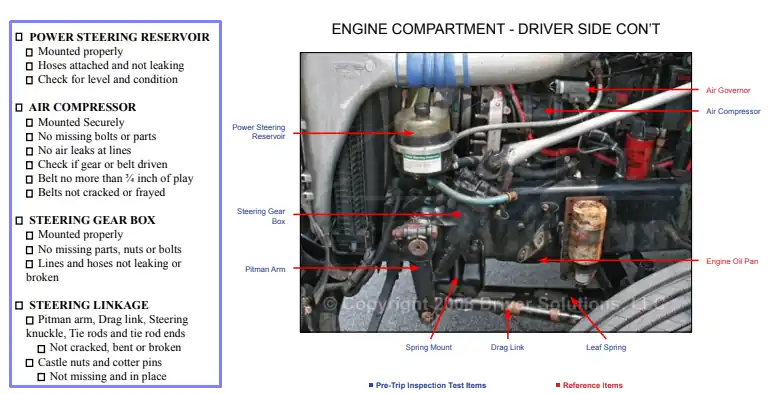
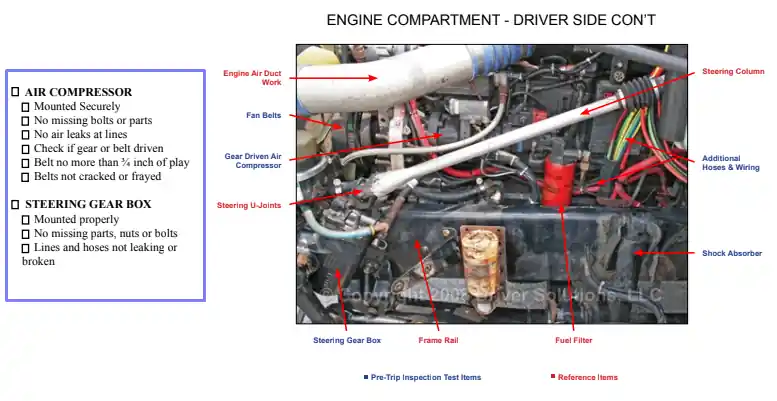
Here, you have a bit more things to check. Pictures you see in the checklist contain hints about every single detail that you should examine. Among them are coolant, steering gearbox, air compressor, power steering reservoir, steering linkage.
Follow the checklist’s instructions to examine everything as advised. Mark all the boxes with ticks if everything works properly. The main concept is still not to have any leaks, damages, missing details, or cracks, and anything that can lead to the vehicle’s malfunctioning.
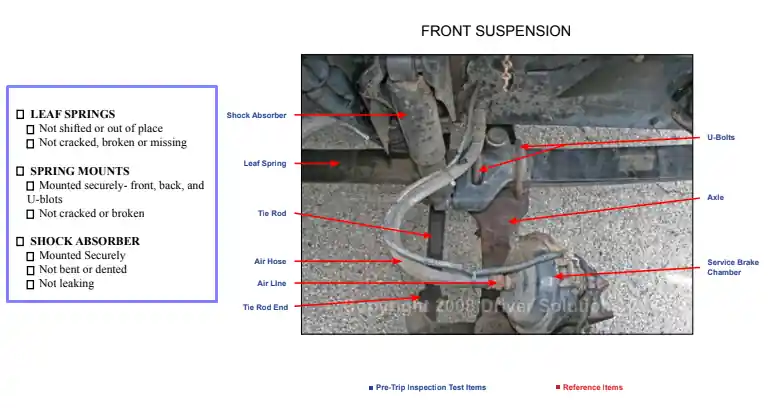
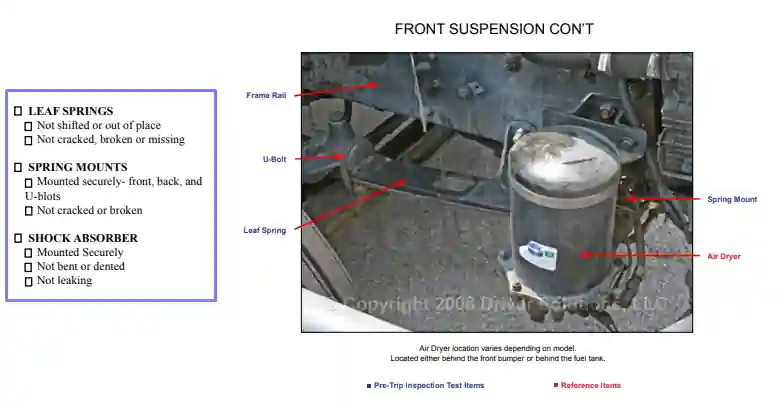
After you are done with a thorough engine check, proceed to the front suspension of your vehicle. It consists of a wide range of details that must be mounted and linked securely. Keep following the checklist and its guidelines: go through spring mounts, leaf springs, and the shock absorber.
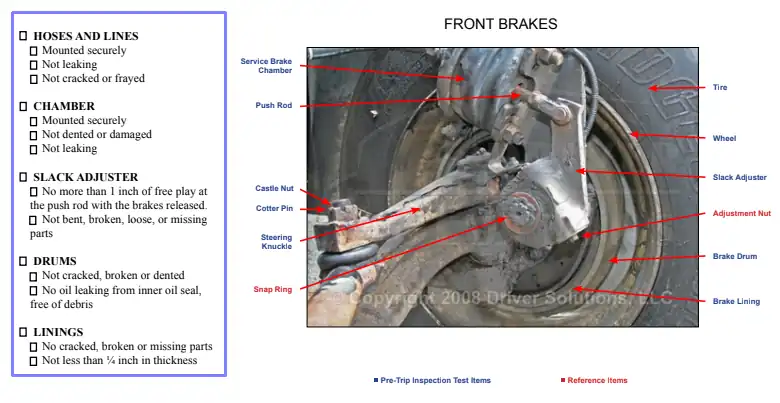
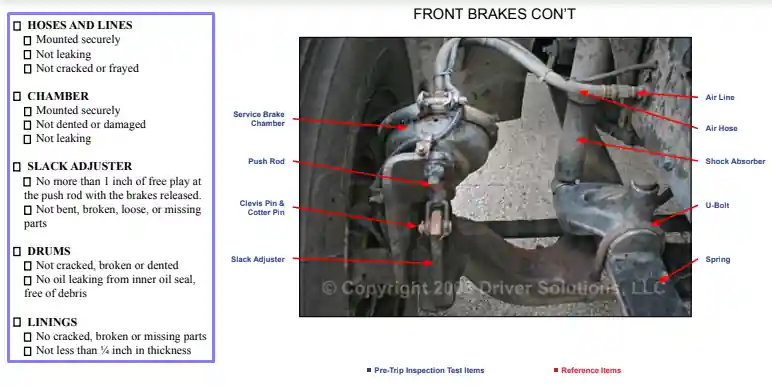
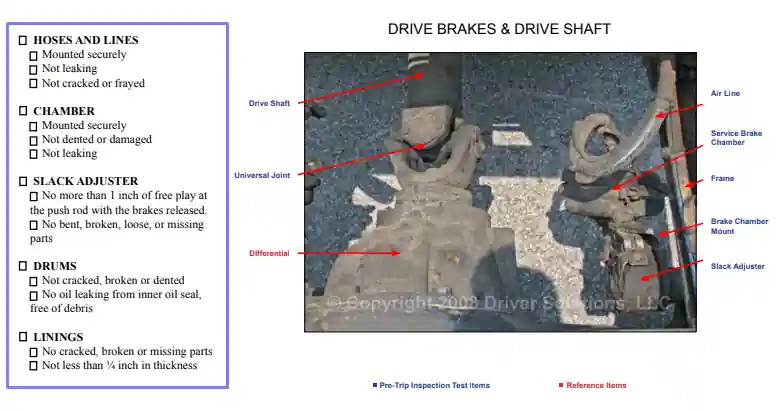
Breaks are one of the most essential parts of any vehicle. If they crash and you cannot stop your vehicle, the consequences might be catastrophic. So, now you have to check them properly. See hoses and lines, drums, linings, a chamber, and a slack adjuster. If it seems complicated, the pictures will still help you understand what is what.
Check every detail in accordance with the checklist. Again, there should be no leaks or absent details, and all connections should be secured. Include the information in the template.
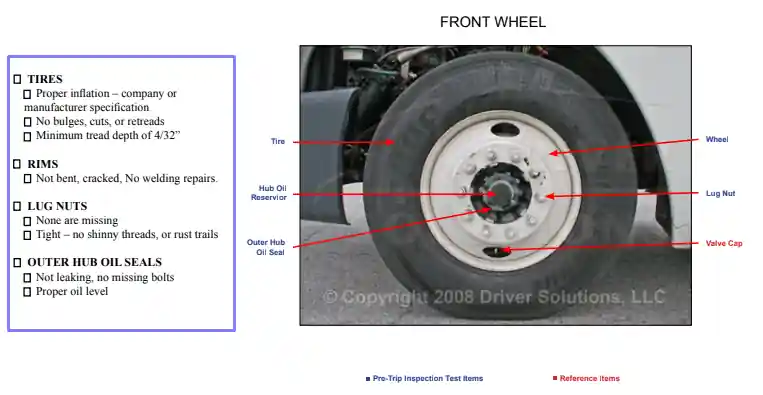
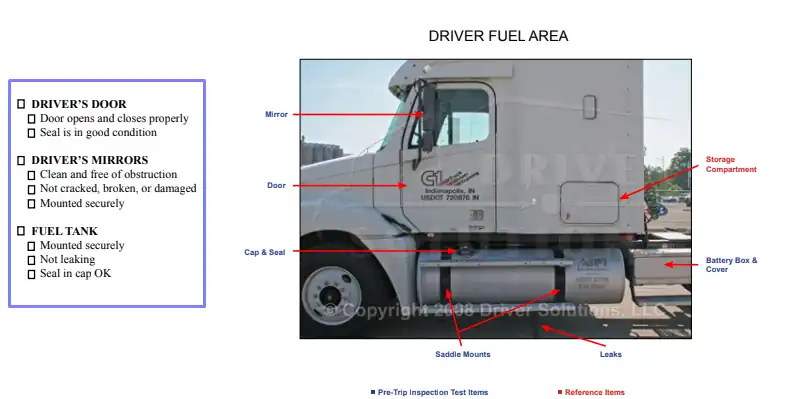
Check the tires and rims of your vehicle’s wheels, then see if no nuts are missing and the oil level is fine. Examine the door and mirrors on your side. Inspect the fuel tank under the door. Then, mark the points in the checklist.
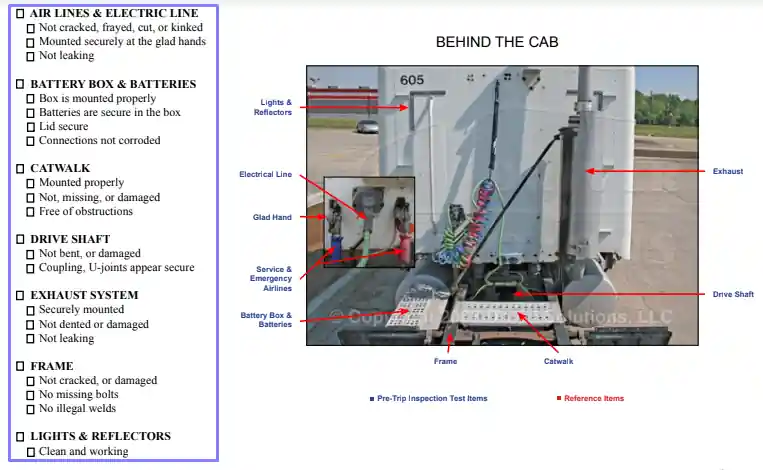
You have completed the front check; now, move behind the cab and start an inspection there. Go through the frame, lights, catwalk, driveshaft, electric and airlines, batteries, and exhaust system.
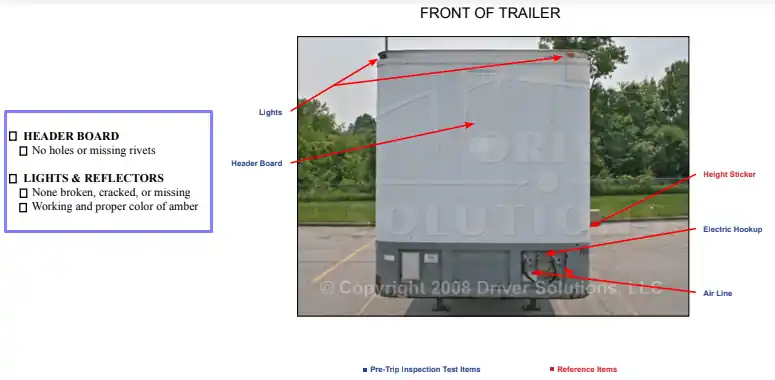
Next, check the front of the trailer connected to the truck. Its body should not have any holes, and the lights must work properly. Reflect the check results in the form.
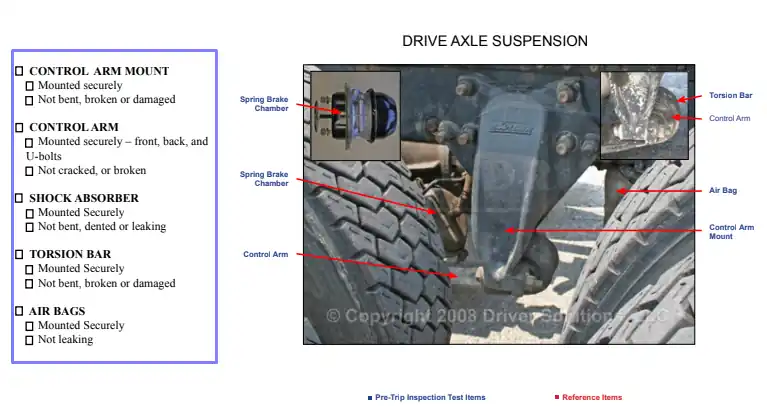
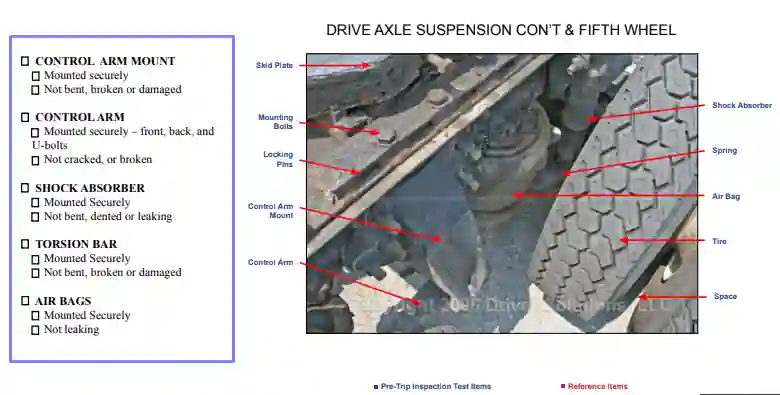
Examine all the listed details, including a control arm, torsion bar, airbags, and other important items. If everything is in order and you see no leaks or malfunctions, state it in the checklist by marking all options and proceed to the next part of your inspection.
Verify that everything is fine with those elements: you have already checked other wheels and breaks, so you know what exactly you should test. Use the checklist’s guidance to identify all the details you need to check here. After ensuring everything is great, move to the next step.

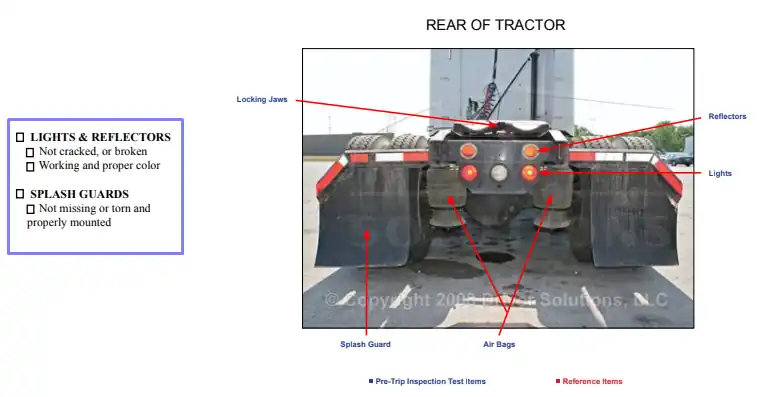
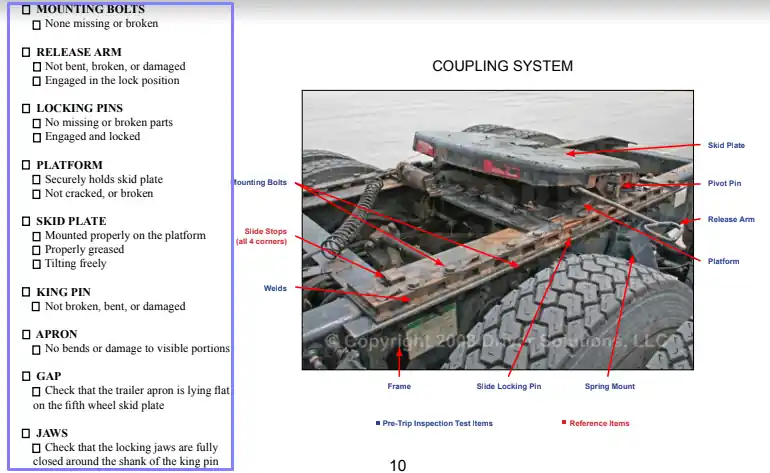
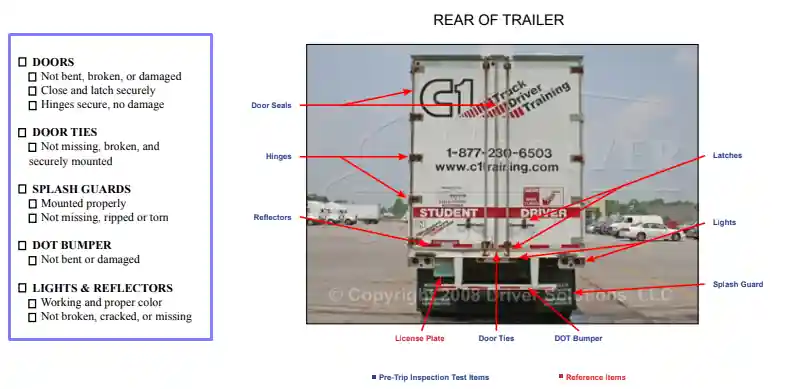
Check lights and splash guards of the rear and test multiple items of the coupling system as recorded in your checklist. Insert the results in the template.
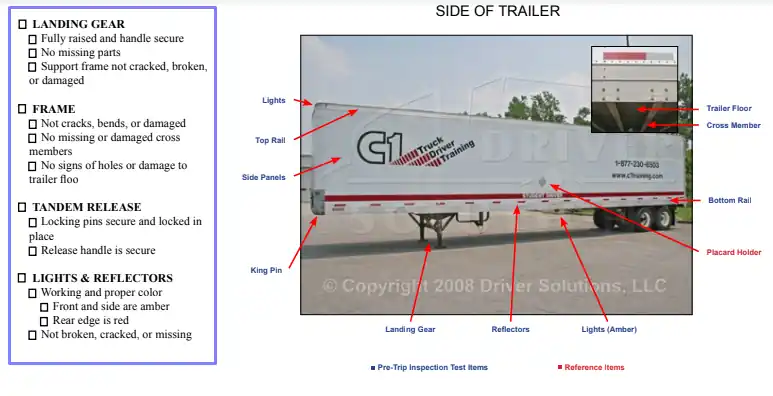
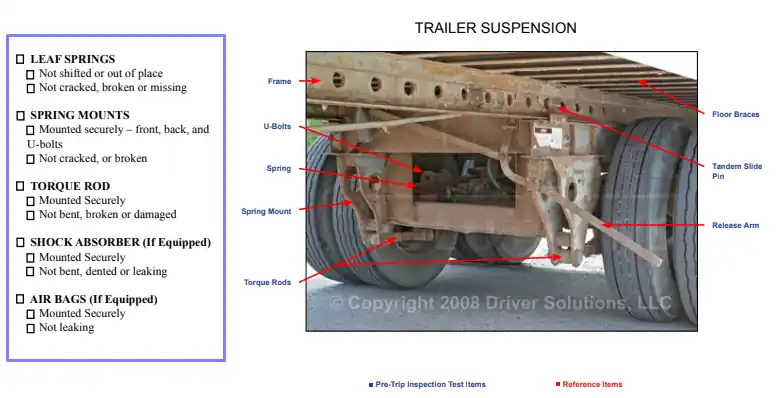
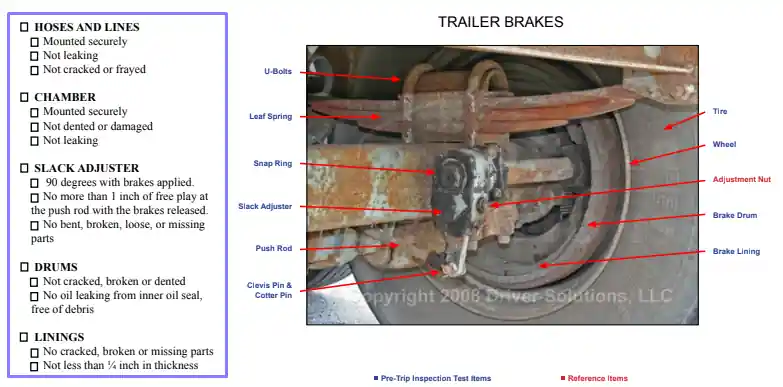
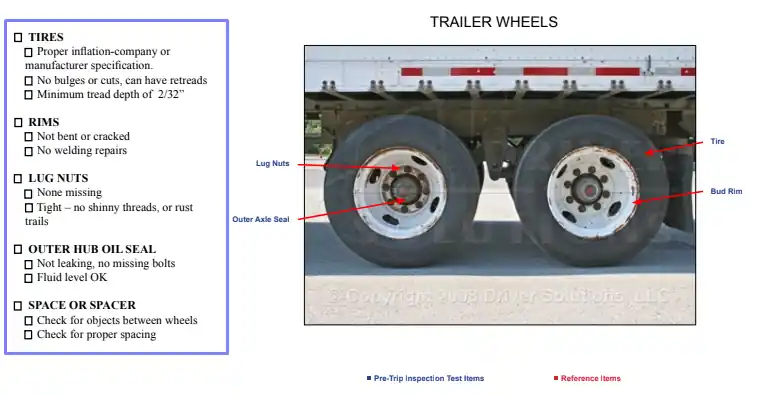
Start with the trailer’s sides and ensure that lights are working and the sides themselves do not have any damages (as well as sides’ connections and details). Then, inspect the suspension the way the checklist advises you. Proceed to the brakes and wheels.
This should be easier now because you have done all of those before with your tractor. However, if something is uncertain, consult the checklist’s pictures. If everything looks good, tick all the relevant boxes.
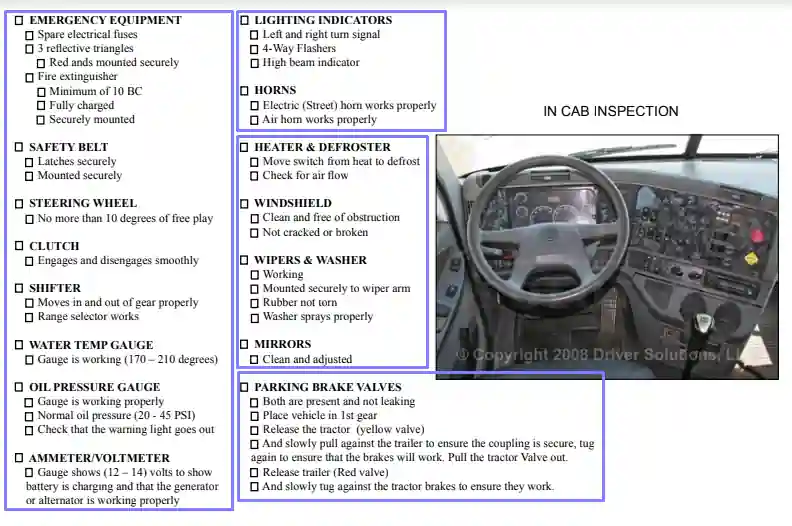
Finally, you have to see what is happening in the cab where you will sit and drive. Here, the list of items to inspect is long.
Check if you have all emergency equipment in place. Move to the steering wheel, horns, safety belt, clutch, and shifter. See if they work properly. Then, verify that your windshield is clean and has no cracks, and test the washer and wipers.
Turn on the heater and try switching its modes. All of them must work and provide you with an appropriate temperature. Look at the dashboard and ensure that all indicators from the checklist are roadworthy.
After ensuring that your vehicle’s cab is in good condition, add your last ticks to the checklist. Now, you are all set and ready to go.
Bear in mind that any problem, even the littlest one, may lead to huge problems on the road. If something bothers you or you feel like you need a double-check with repairmen, do not hesitate to visit a reliable service nearby. You should not start a trip with such concerns because it may threaten your life.