Hawaii Limited Power of Attorney Form
A Hawaii limited power of attorney is a legal document that allows an individual (the principal) to grant specific powers to another person (the agent or attorney-in-fact) to act on their behalf in designated matters. This type of power of attorney is limited to particular actions or events, distinguishing it from a general option that covers a wide range of actions or broad authority.
The powers granted are explicitly defined and limited to particular activities. Examples include managing financial transactions, selling property, or attending legal proceedings for a specific event or within a predetermined timeframe.
You can fill out all the Hawaii power of attorney forms by following this link to our state-specific section.

Build Your Document
Answer a few simple questions to make your document in minutes
Save and Print
Save progress and finish on any device, download and print anytime
Sign and Use
Your valid, lawyer-approved document is ready
The execution of a limited power of attorney must adhere to specific legal requirements as outlined in the Hawaii Revised Statutes under the Uniform Power of Attorney Act (§§ 551E-1 – 551E-63):
- Specifically, for a limited power of attorney to be legally binding, it must be duly signed in the presence of a notary public as mandated by § 551E-3.
- Under § 551E-31, the agent possesses the authority to perform duties as explicitly outlined in the power of attorney document.
The principal may revoke the authority at any time, provided they are of sound mind. The principal must also give clear notice to the agent and often to third parties who may have relied on the authority. Overall, a Hawaii limited power of attorney allows agents to perform specific tasks while assuring principals that their authority does not extend further than is expressly granted.
Hawaii Limited Power of Attorney Form Details
| Document Name | Hawaii Limited Power of Attorney Form |
| Other Name | Hawaii Special Power of Attorney |
| Relevant Laws | Hawaii Revised Statutes, § 551E-31 |
| Avg. Time to Fill Out | 8 minutes |
| # of Fillable Fields | 32 |
| Available Formats | Adobe PDF |
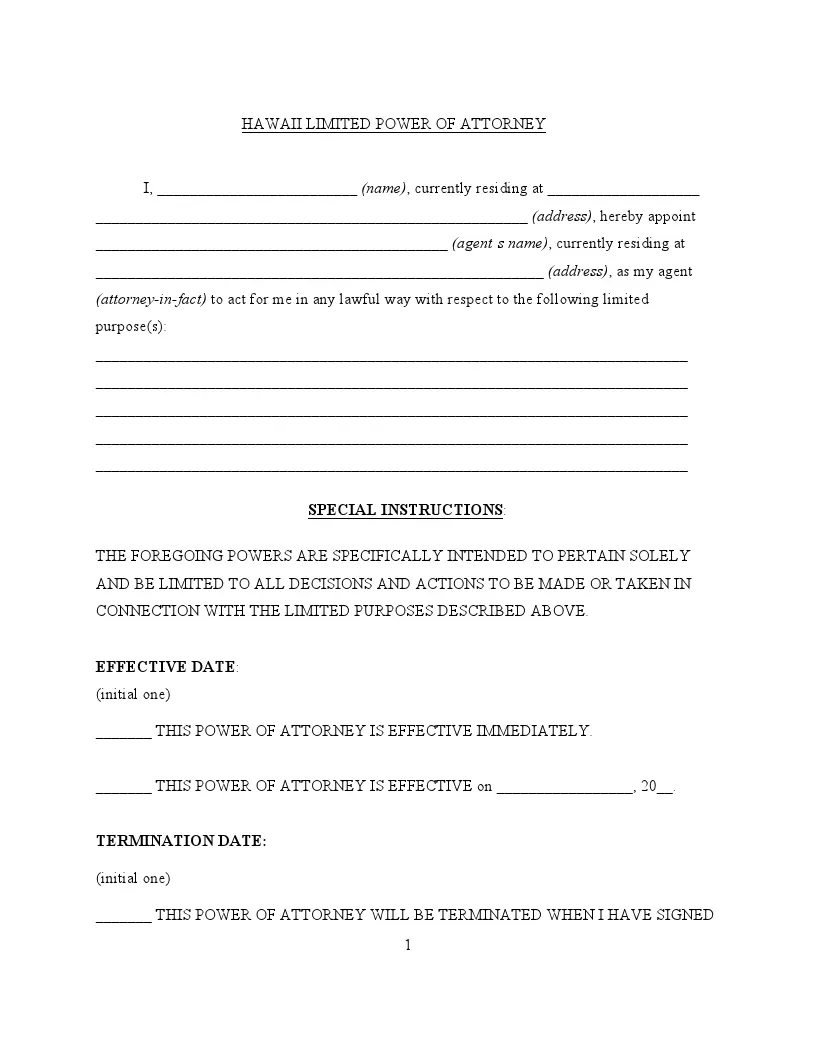
Filling Out Hawaii Limited POA
Follow these detailed steps to accurately fill out a limited power of attorney form in Hawaii.
1. Principal and Agent Information
Fill in your full name and address where indicated at the beginning of the form. Below this, enter the full name and address of the person you appoint as your agent.
2. Define the Powers Granted
Clearly describe the specific powers you are granting to your agent in the spaces provided under “Special Instructions.” Be as detailed as possible to avoid ambiguity about your agent’s authority.
3. Effective Date and Termination
Choose when a power of attorney becomes effective:
- Initial next to “This Power of Attorney is Effective Immediately” if it should start right away.
- If it should start on a future date, initial the corresponding line and specify the date.
Then, decide when the power of attorney will end:
- For an automatic revocation upon signing a written notice, initial the corresponding line.
- To end on a specific date, provide that date next to the relevant initial box.
If it should terminate upon your incapacity, initial the corresponding line.
4. Successor Attorney-in-Fact
If the initial agent is unable to serve, you may appoint a successor. Enter the name and address of the alternate agent in the designated section.
5. Signing the Form
Sign the document in the presence of a notary public on the date you specify. Be sure to print your name under your signature.
6. Notarization
The notary public will verify your identity and complete the acknowledgment section, confirming the authenticity of your signature.
7. Distribute Copies
After the form is notarized, provide a copy to your agent, successor agents, and any institutions or individuals who will interact with the agent under this power of attorney. Keep the original in a safe but accessible place.
