It shouldn't be difficult to create a blank autopsy report PDF using our PDF editor. Here is how to complete your document quickly.
Step 1: Click the orange "Get Form Now" button at the top of the page.
Step 2: You can now manage the blank autopsy report PDF using the multifunctional toolbar. You can add, remove, or customize the content, highlight selected elements, and perform other editing commands.
To complete the blank autopsy report PDF, fill in the details for all required segments:

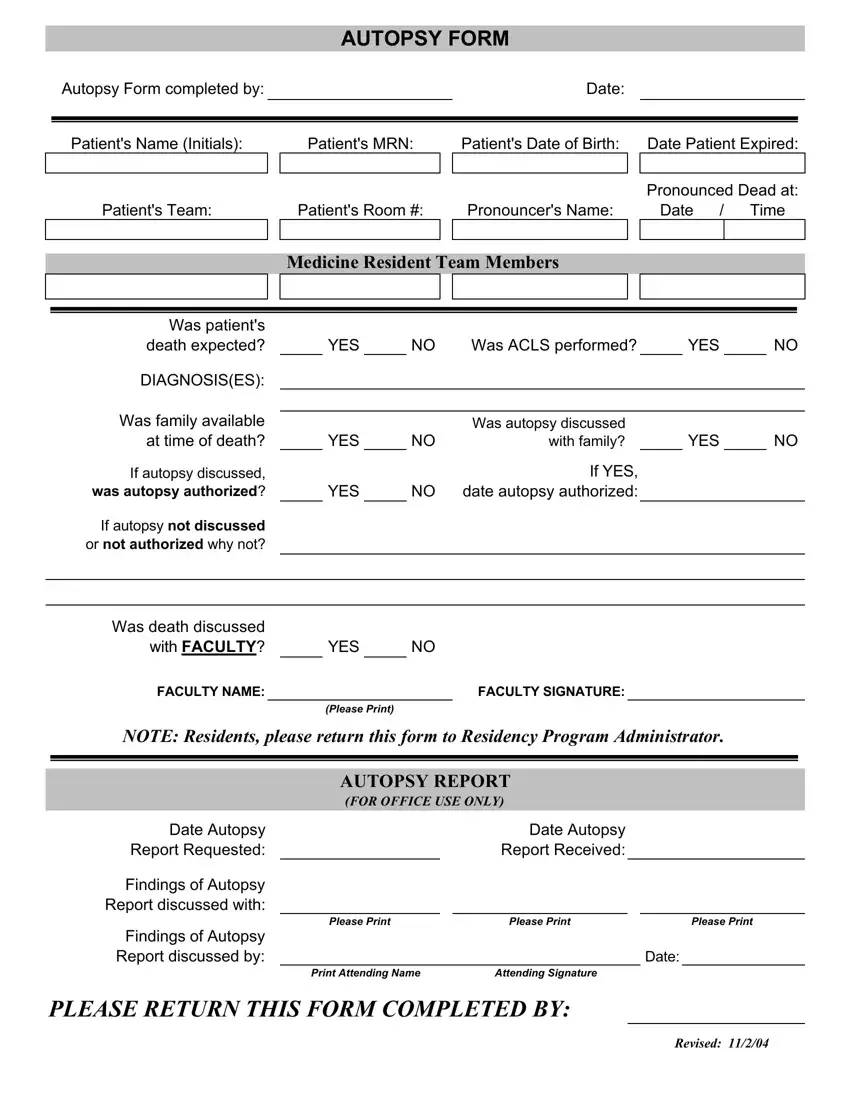
Write the required information in the following fields: If autopsy discussed, date autopsy authorized, if autopsy not discussed or not pursued, Was death discussed with FACULTY, FACULTY NAME, FACULTY SIGNATURE, Date Autopsy Report Requested, and Date Autopsy Report Received.
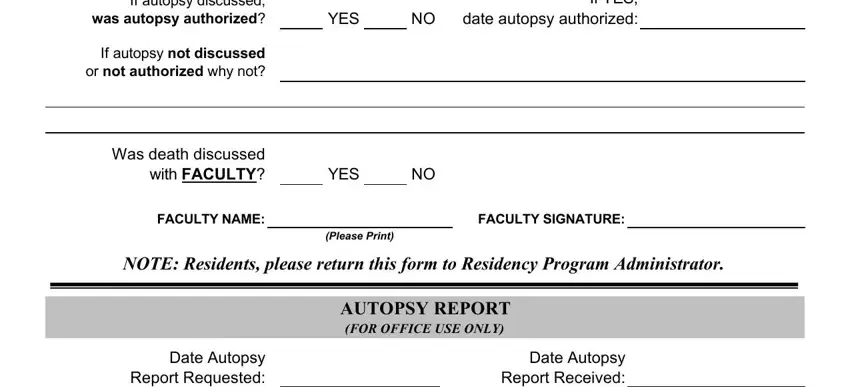
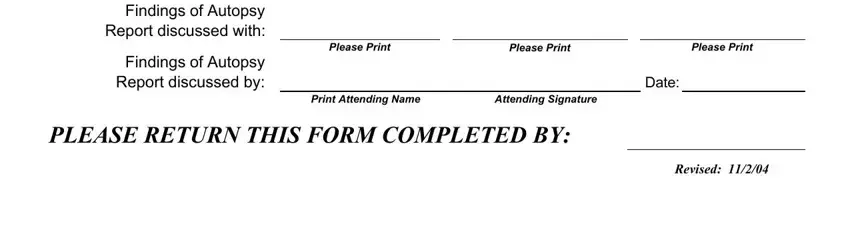
Fill in the Findings of Autopsy Report section, including the attending physician's printed name, signature, and date. Make sure the Revised section is completed before submission.
Step 3: Click "Done" when finished. You can then export the PDF to your device or send it via email.
Step 4: Make copies of the form if needed. Your information is private and will not be shared or stored by FormsPal.
Related Death Documentation Forms
After completing the autopsy report, you may also need these related documents:
- Autopsy Report Request Form - use this to formally request a copy of a completed autopsy report from a medical examiner's office
- County Autopsy Report Request - for requesting reports from county medical examiner offices
- CDC Standard Certificate of Death - the official federal death registration document required in most jurisdictions
- Medical Report Form - a general medical report template for other clinical documentation needs
