Electrical Panel Schedule Template

Edit
Fill out
Sign
Export or Print
Download your fillable Electrical Panel Schedule Template in  PDF
Electrical Panel Schedule Template

First of all, wire laying is to be performed by a certified professional in order to ensure the topmost result of the procedure and guarantee safety and security to your household and your family as well. To minimize the risks of failures, professional electricians should keep in mind and follow the points from the schedule precisely. Let us now define the electrical panel schedule and underline its distinctive points.

A panel schedule is a convenient tool for planning wiring connections. It is a table that contains all the essential information for an electrician to outline the wire laying system. Usually, the panel schedule is compiled and used at the wire pulling stage. The schedule of internal wire connections ensures the correct connection with electrical panels and control boards.

Wiring back to the power panel, use the electrical panel schedule template to avoid mistakes at the final stage of installation. Now we can prepare the panel schedule online, so let’s figure out how to do it!

In this article, we will walk you through the definition and the essential aims of the electrical panel schedule, discover the reasons electricians name as valid to use the schedule, and delve into details of filling the form out.

Detailed Panel Schedule Description

So, the electrical panel schedule is a table with basic data for wire laying. In fact, this table is a guide for every electrician that tells them what equipment needs power. In other words, the panel schedule makes the order of wire output clear that is especially useful for electricians who operate with multi-channel circuit diagrams. The panel schedule also clarifies the details of the electrical power supply that is important for different electrical loads for each device that requires electricity.

The purpose of the panel schedule is understandable. Now let’s look at its structure. The classic panel schedule consists of two parts, namely the header (main information) and the document body (technical details). The general data will prevent you from getting confused in the wiring diagrams if you are working in a room with many types of equipment with different degrees of power consumption. Actually, the table will tell you how to lay the wires.

Please remember that the panel schedule should not be confused with the equipment schedule. This latter one guides the electrician on what wire size, voltage, and phase is required for a particular equipment and power panel.

Why do Electricians Use the Panel Schedule?

The panel schedule is an instruction that the electrician uses at the final stage of work. After boxing, laying the pipes, and laying out the branches of the electrical circuits, the electrician pulls the wires back to the power panel. At this point, it is very important not to miss anything, and the panel schedule helps to cope with the layout of the wires and the correct connection. Thus, a properly designed schedule guides the electrician and saves him from redoing wiring.

There are several ways to create a panel schedule. The main requirement is that it corresponds with approved drawings. Here are a convenient electrical panel schedule template and some tips on how to fill it out. To quickly fill the panel schedule out, use our online form builder that allows you to make auto- settings of the table.

Other Charts and Tables

If you wish to check more charts and tables documents you can edit and fill out here, listed below are some of the forms searched often by our users. Besides that, keep in mind that it is easy to upload, fill out, and edit any PDF form at FormsPal.


How to Complete Electrical Panel Schedule

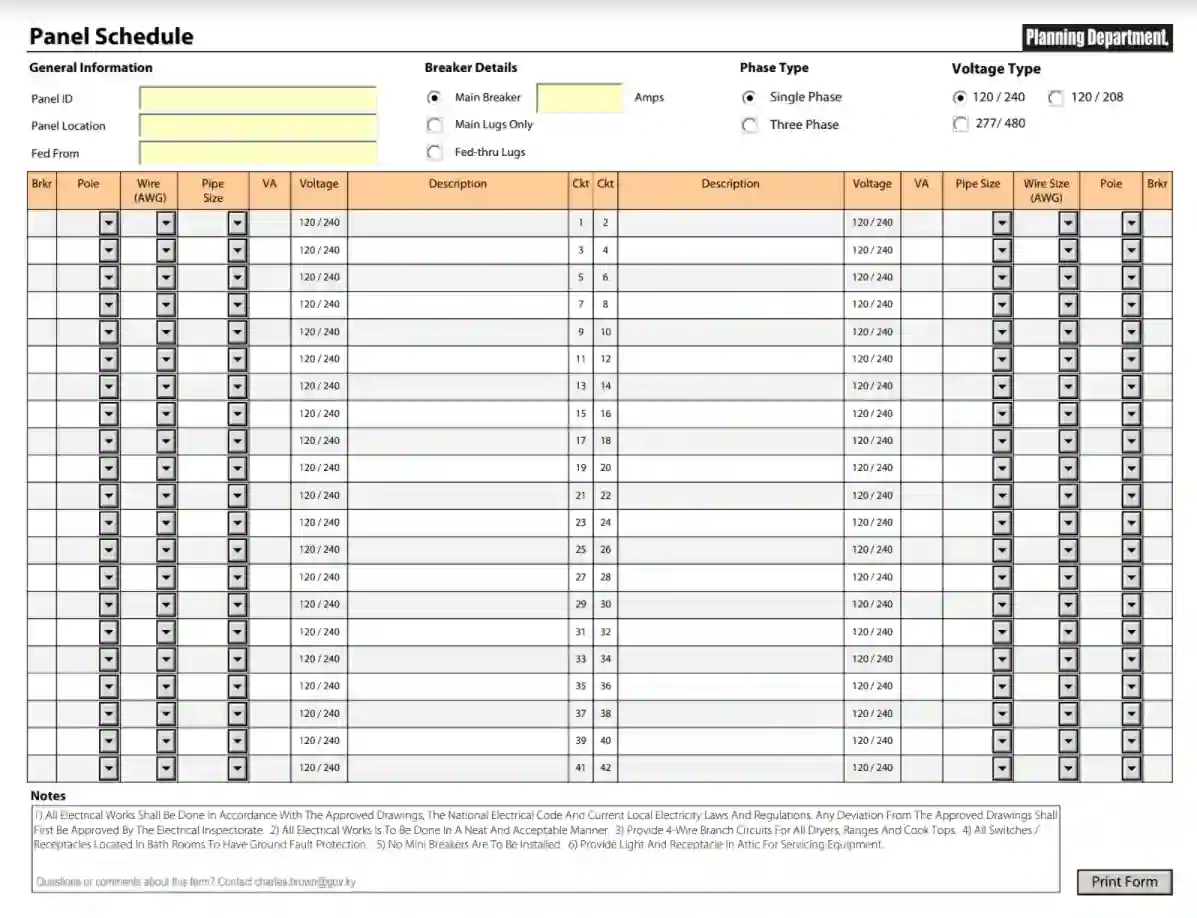
We have already talked about the structure of the schedule above, so now we will only highlight the main points of filling it out. The upper part, or header, includes four sections that should be filled in first.

Fill out general information

This is the section that reveals the ID and location of the panel and also indicates the power source. This is the ID of the specific panel schedule for that room.

step 1 fill out general information filling out electrical panel schedule

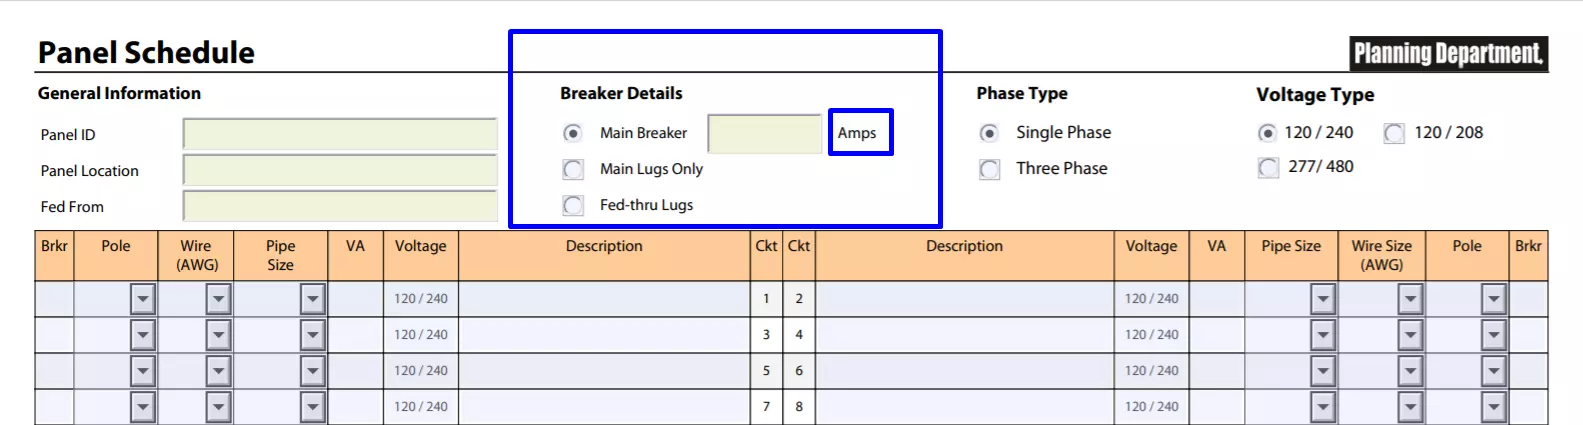
 Select the breaker details

Here you should denote the type of load center, namely main breaker, or main lugs only, or feed-thru lugs. For the first option, specify the number of amps.

step 2 select the breaker details filling out electrical panel schedule

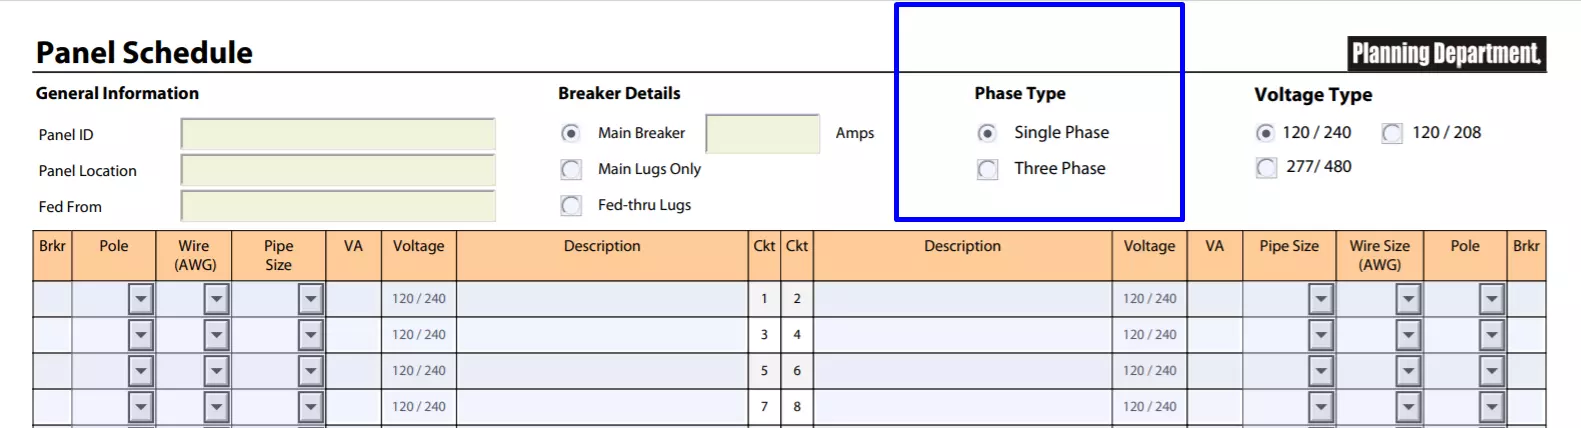
 Enter the phase type

Indicate whether you are dealing with a two-phase or three-phase energy transfer device.

step 3 enter the phase type filling out electrical panel schedule

Point out the voltage type

Finally, select the type of voltage that is relevant to your facility. After setting the paper header up, the corresponding data automatically displays in the column headers of the table.

step 4 point out the voltage type filling out electrical panel schedule

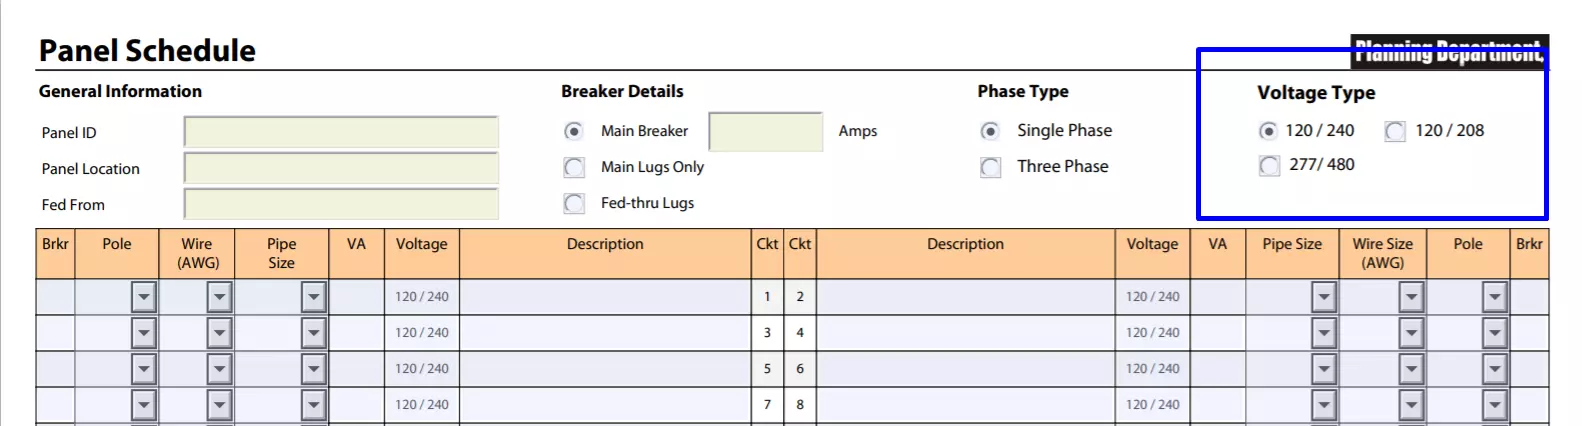
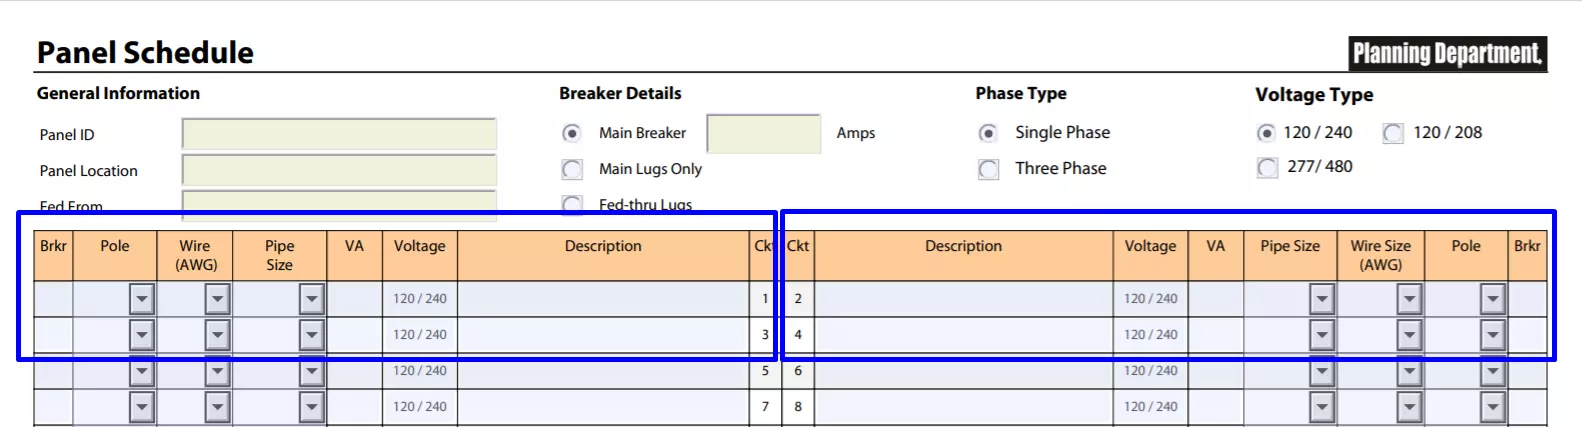
Specify the technical data

Using the selectors, fill in the table. Enter the necessary data to create a complete panel schedule that will serve as a guide to the wiring stage back to the power unit.

step 5 specify the technical data filling out electrical panel schedule