
A Massachusetts limited power of attorney is a document in which you, the principal, name an agent (also called an attorney-in-fact) to handle specific tasks for you. The word “limited” means the agent’s role covers only the tasks you list, unlike a general power of attorney. Fill in the free form on this page online or print the PDF.
Last Updated: October 2026. This guide is reviewed and updated regularly to reflect current law. If you notice an error or outdated information, please contact us.
Build Your Document
Answer a few simple questions to make your document in minutes
Save and Print
Save progress and finish on any device, download and print anytime
Sign and Use
Your valid, lawyer-approved document is ready
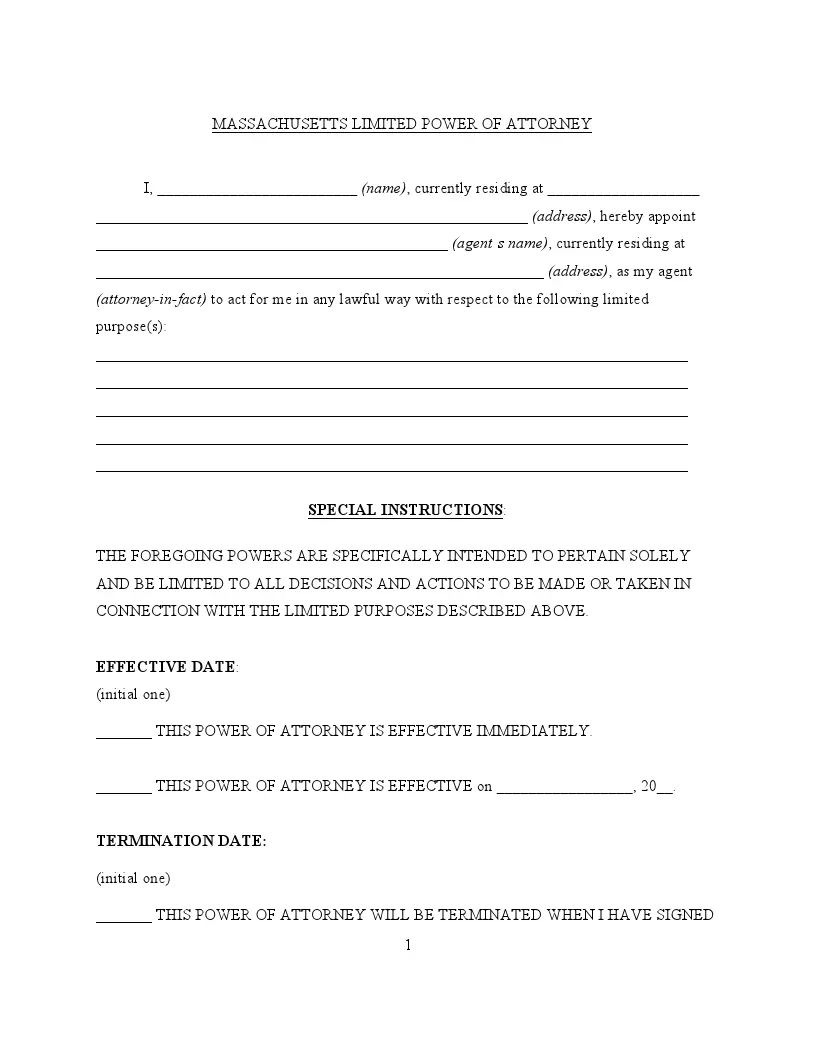
Here are the basic details of the FormsPal Massachusetts limited power of attorney template. The template offers 32 fillable fields in a PDF, and you can also create the document online without downloading anything first.
| Document Name | Massachusetts Limited Power of Attorney Form |
| Other Name | Massachusetts Special Power of Attorney |
| Relevant Laws | General Laws of Massachusetts, Section 5-501 |
| Avg. Time to Fill Out | 8 minutes |
| # of Fillable Fields | 32 |
| Available Formats | Adobe PDF |
A limited power of attorney is used to manage specific tasks such as real estate transactions, financial management, or healthcare decisions strictly according to the guidelines detailed in the document. Unless otherwise specified, it typically takes effect when signed and can be established as durable. This means the Massachusetts power of attorney forms remain valid even if the principal becomes incapacitated as long as the document explicitly mentions this condition.
In Massachusetts, the creation and execution of a Limited Power of Attorney are governed by specific legal standards to ensure its validity and enforceability. The pertinent laws are outlined in the General Laws of Massachusetts, Chapter 190B, Article V, Sections 5-501 to 5-507. Additionally, current Bill H.1598, An Act Relative to the Uniform Power of Attorney Act, also helps to standardize the rules and expectations surrounding POA in Massachusetts.
Signing requirements for a limited power of attorney in Massachusetts include:
Furthermore, if the principal decides to revoke the power of attorney, Massachusetts law mandates that written notice be provided as specified in Section 5-504. This formal process is crucial for legally terminating the powers granted to the attorney-in-fact, thereby safeguarding the principal’s interests.
These steps follow the FormsPal Massachusetts limited power of attorney template, the same PDF you can download from this page. Work through them in order, and fill in the blanks by hand or on screen. Each step names a part of the form and says what to enter there.
The screenshots under each step show the FormsPal Massachusetts Massachusetts Limited Power of Attorney template filled with sample entries in blue, so you can see where each answer goes. The names, addresses, dates and amounts are examples only.
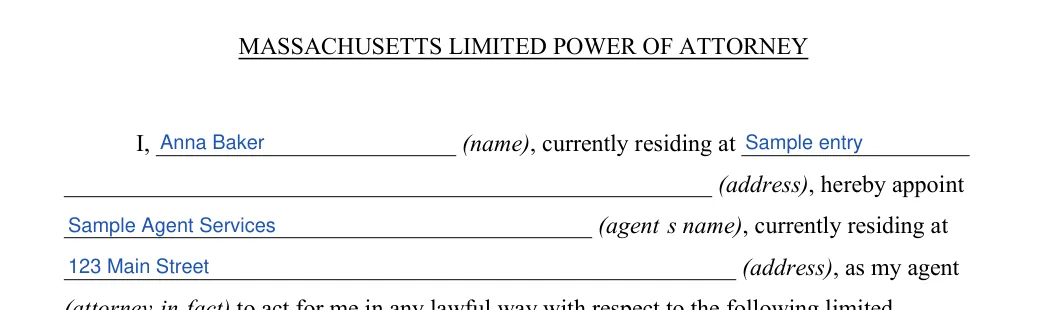
Name, address and agent
Fill in the opening paragraph: your name, your address on two lines, then your agent’s name and the agent’s address. Use your full legal name as it appears on your personal ID, and pick an agent you trust.
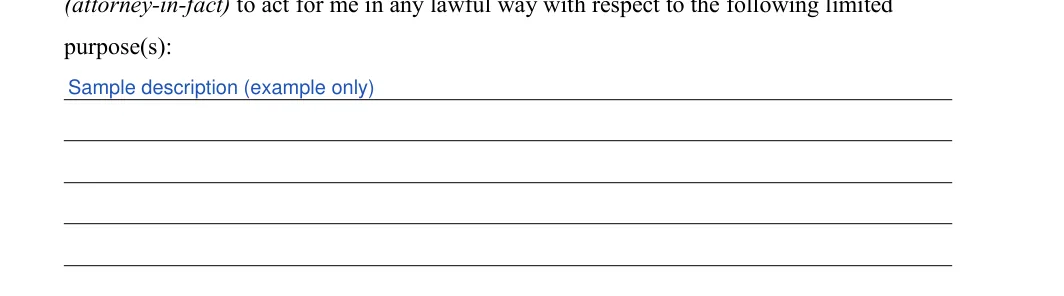
Purpose(s)
On the purpose lines, write each task your agent may handle for you, for example signing closing papers for a home sale. You have five lines, so keep each task short, clear and specific.
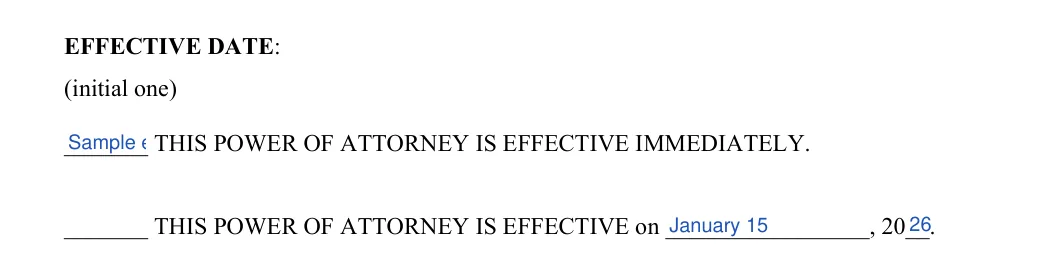
Effective date
Read the two options and initial the one you want: effective right away, or effective on a date you write in. The special instructions line above is printed text, so it has no blank to fill in.
Termination date, first option
Initial the first termination option if the power of attorney should end when you sign a written revocation. The other termination options continue on page 2.

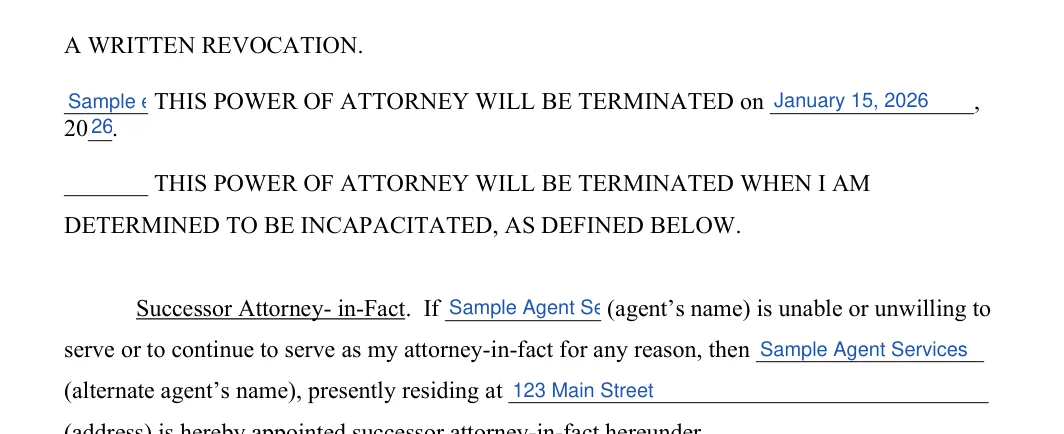
Termination date, remaining options
Initial the option you want: it ends on a date you enter, or it ends when you are determined to be incapacitated as defined on the form. Then complete the successor line: repeat your agent’s name and enter an alternate agent’s name and address, in case your agent is unable or unwilling to serve.
Date, signature and printed name
Fill in the day, month and year on the “Signed this” line. Sign on the signature line and print your name under it.

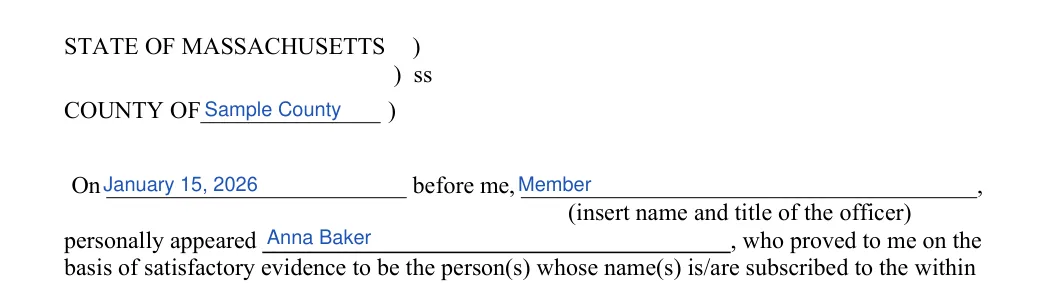
Acknowledgment: county, date, officer and your name
On page 3, enter the county, the date, the name and title of the officer and your own name. Complete this part together with the notary public or other officer.
Acknowledgment signature and seal
The officer signs on the signature line on page 3 and adds the seal where marked.

Filling in the template is only part of the job. The four steps below cover signing, witnesses, notarization and copies, so the finished document is ready for your agent to use.
Sign and Date the Form
Once all parts of the form are completed, sign and date it in the presence of witnesses. The date should include the day, month, and year you execute the document.
Witness Signatures
Massachusetts law requires the limited POA to be acknowledged by two witnesses. These witnesses must watch you sign the document and provide their signatures and addresses on the form. Choose individuals who are not named as attorneys-in-fact and who do not stand to benefit from the POA.
Notarization (Optional but Recommended)
While not always mandatory, notarizing the document with a notary public is recommended. This step lends additional legal weight to the document and can help prevent challenges regarding its authenticity.
Keep Copies
After completing the form, make several copies. Provide one to your attorney-in-fact, keep one for yourself, and consider giving another to a trusted advisor such as a lawyer or family member.

A limited power of attorney covers only the tasks you list. A general power of attorney reaches your affairs more broadly. If you need help with one transaction or one period of time, the limited form keeps the agent’s role narrow.
Pick someone you trust and can reach easily, because this person will act for you on the tasks you list. Talk to them first so they know what you expect, and think about naming a backup agent on page 2 of the template.
Use the purpose lines on page 1. Write each task in plain words and name the account, property or transaction it relates to. Short, specific entries leave less room for confusion. Here are a few examples of task entries:
Yes. Open the downloaded PDF in the FormsPal PDF editor to type your entries, or print it and write by hand. Either way, save a copy of your entries before you sign.
Yes. Page 2 has a successor line where you can enter an alternate agent’s name and address. Fill it in if you want a backup agent named in the same document.
Download a fresh copy of the template and start again, or correct the entry on screen before you print. A clean, easy-to-read page is better than a crowded one with many cross-outs.
Keep the signed original in a safe place and give your agent a copy. A scanned copy on your phone or in cloud storage also helps you find the document quickly when you need it.
General information, not legal or tax advice.
